


Welcome! If you’re a beginner, this guide will walk you through how to start using our services effectively.
If you haven’t registered an account yet, please create an account. We strictly adhere to a no-logs policy to ensure your privacy.
Step 1: Choose Your Product
You can browse our Store where we offer a variety of categories and products. For beginners, we recommend starting with the most affordable plan, which is ideal for those with limited budgets or just getting started.
Step 2: Create Your First Product
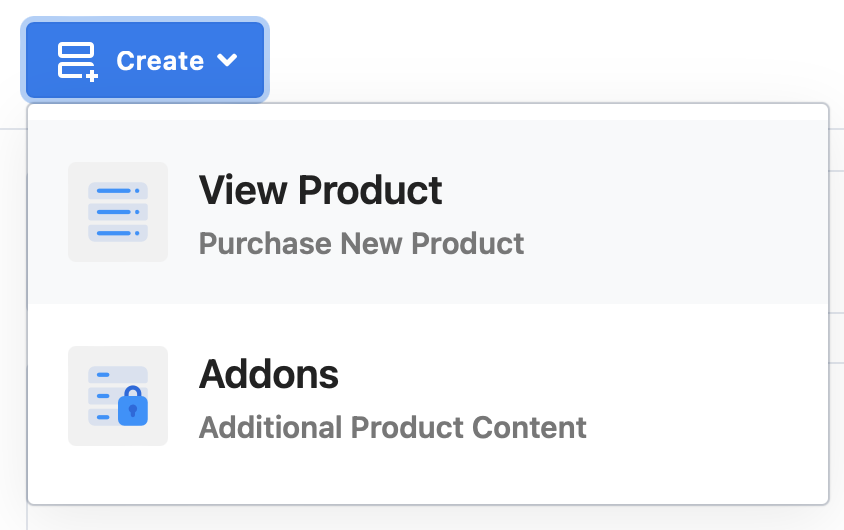
Once you’ve selected your plan, click the Create button and choose View Product to proceed with creating your first product.
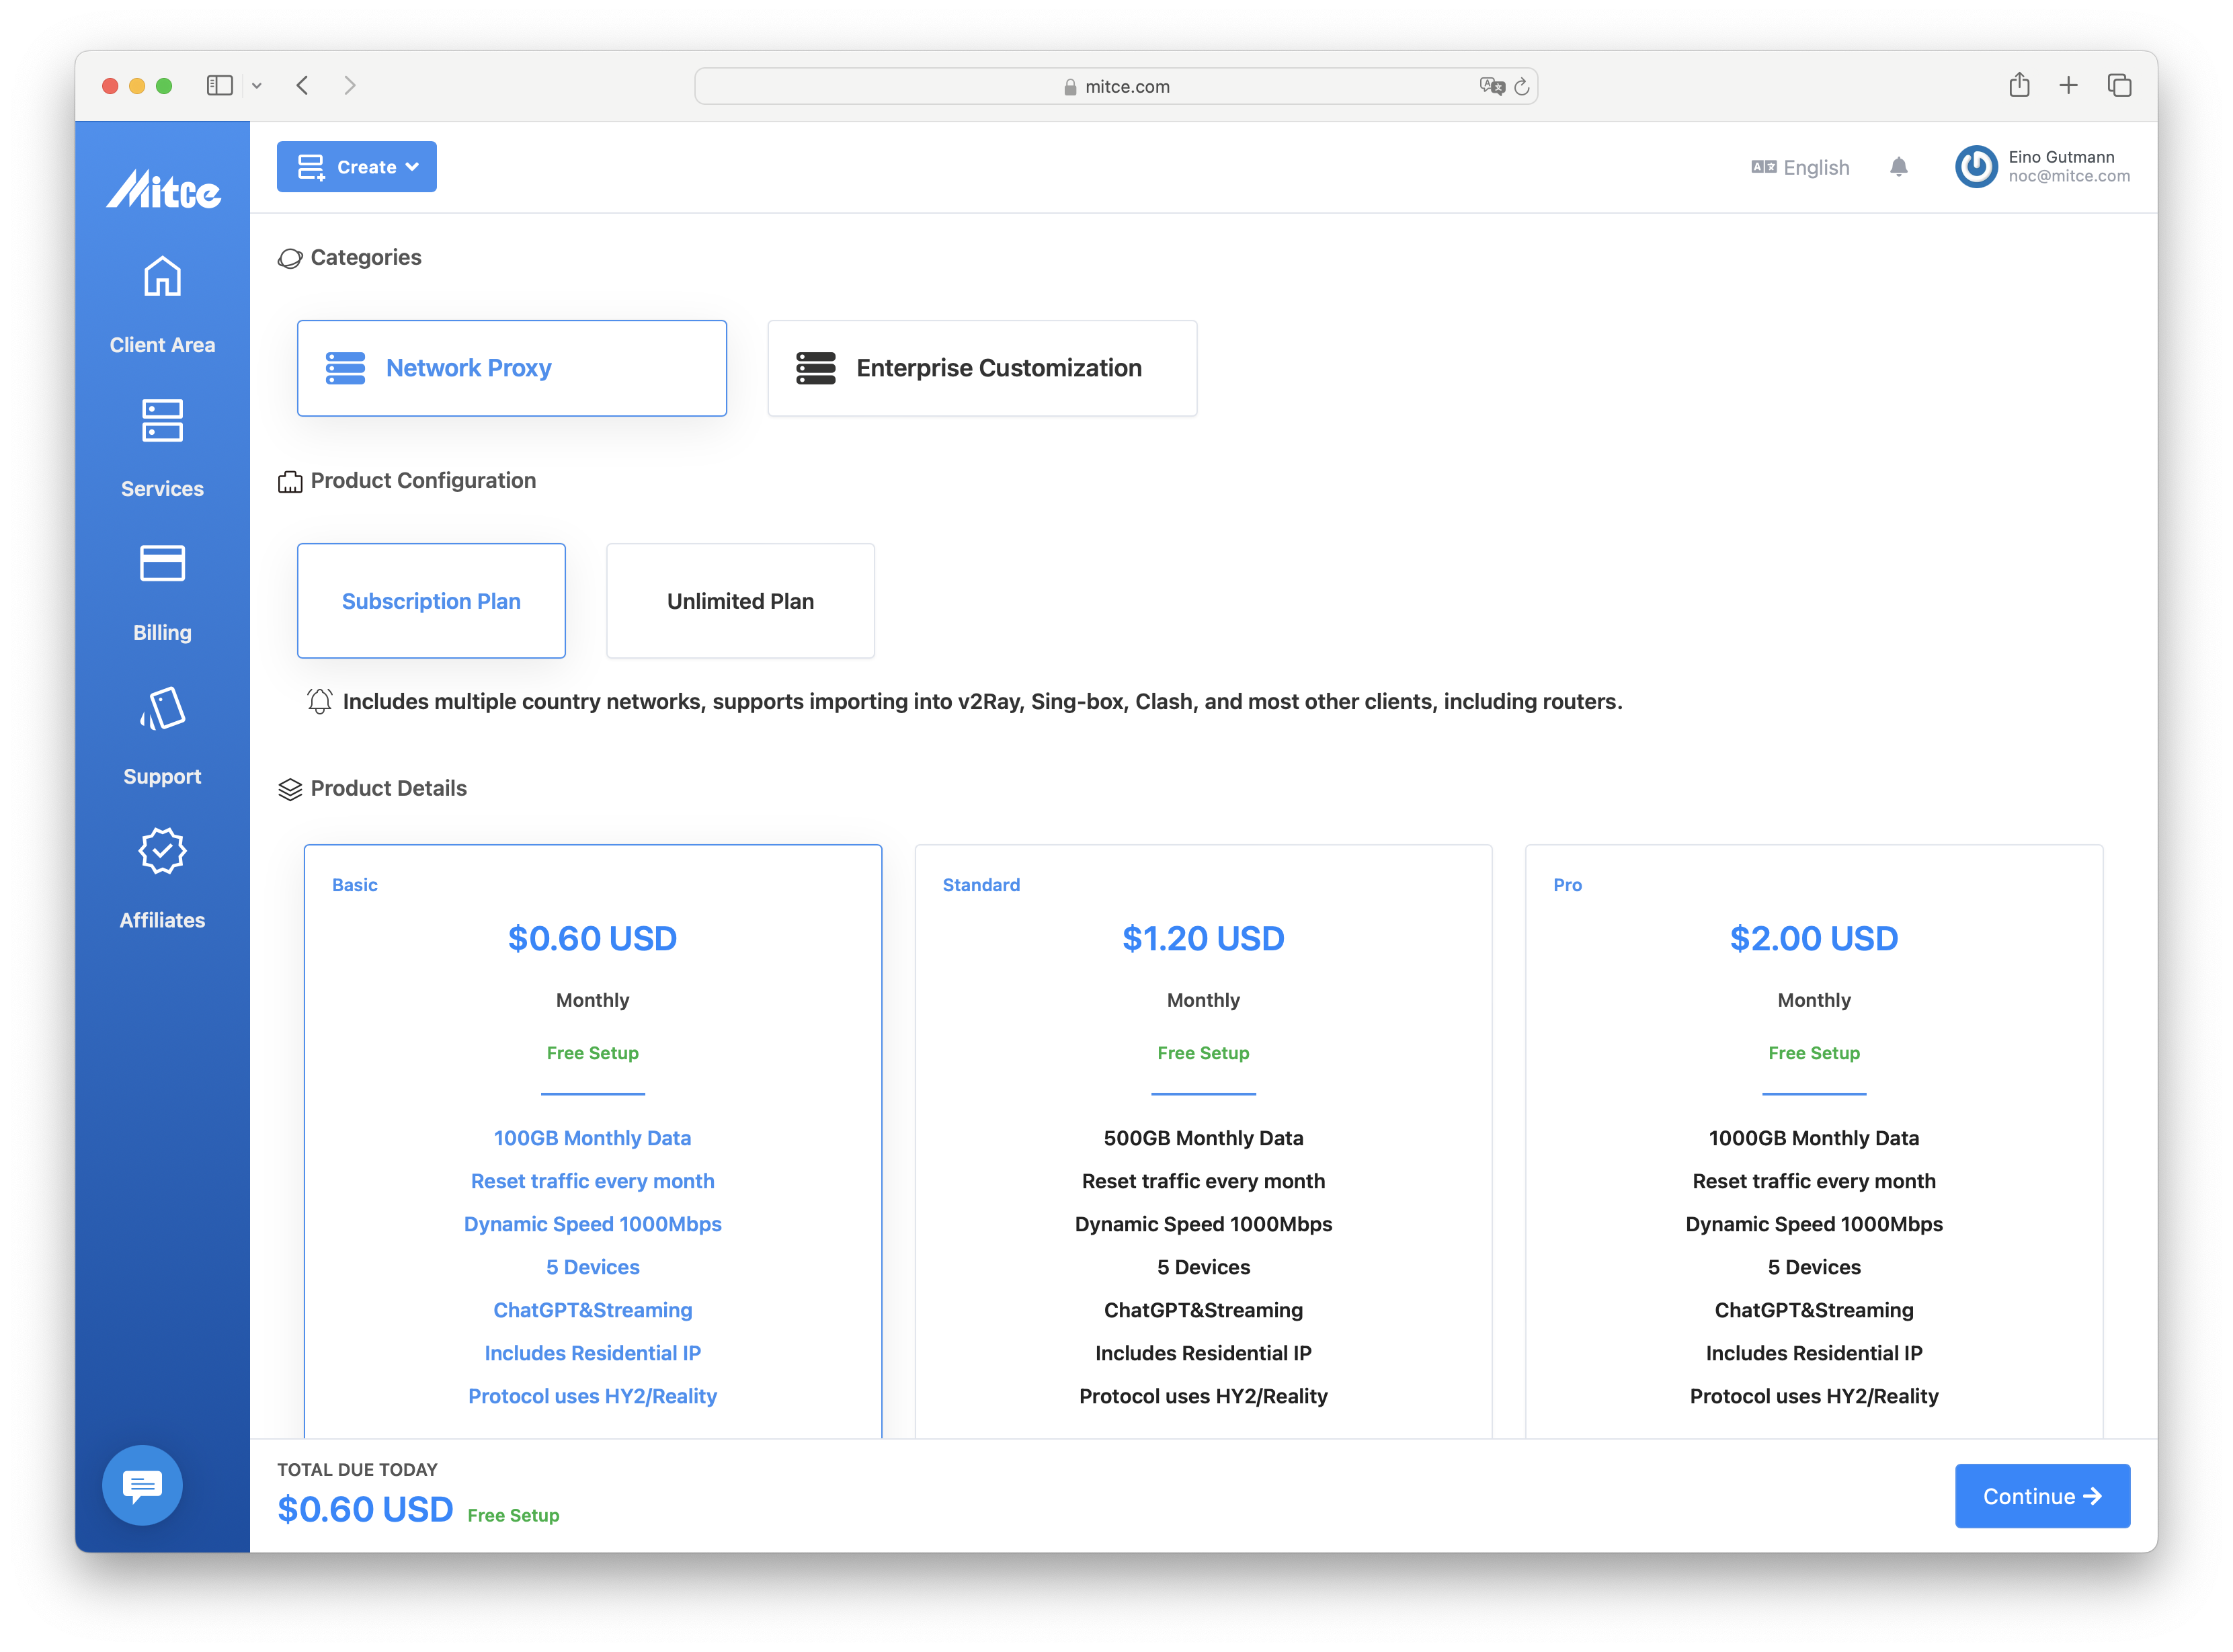
Here, you’ll see several product categories. For this tutorial, we’ll select the most affordable subscription plan, priced at just $0.60 USD. This price is highly competitive!
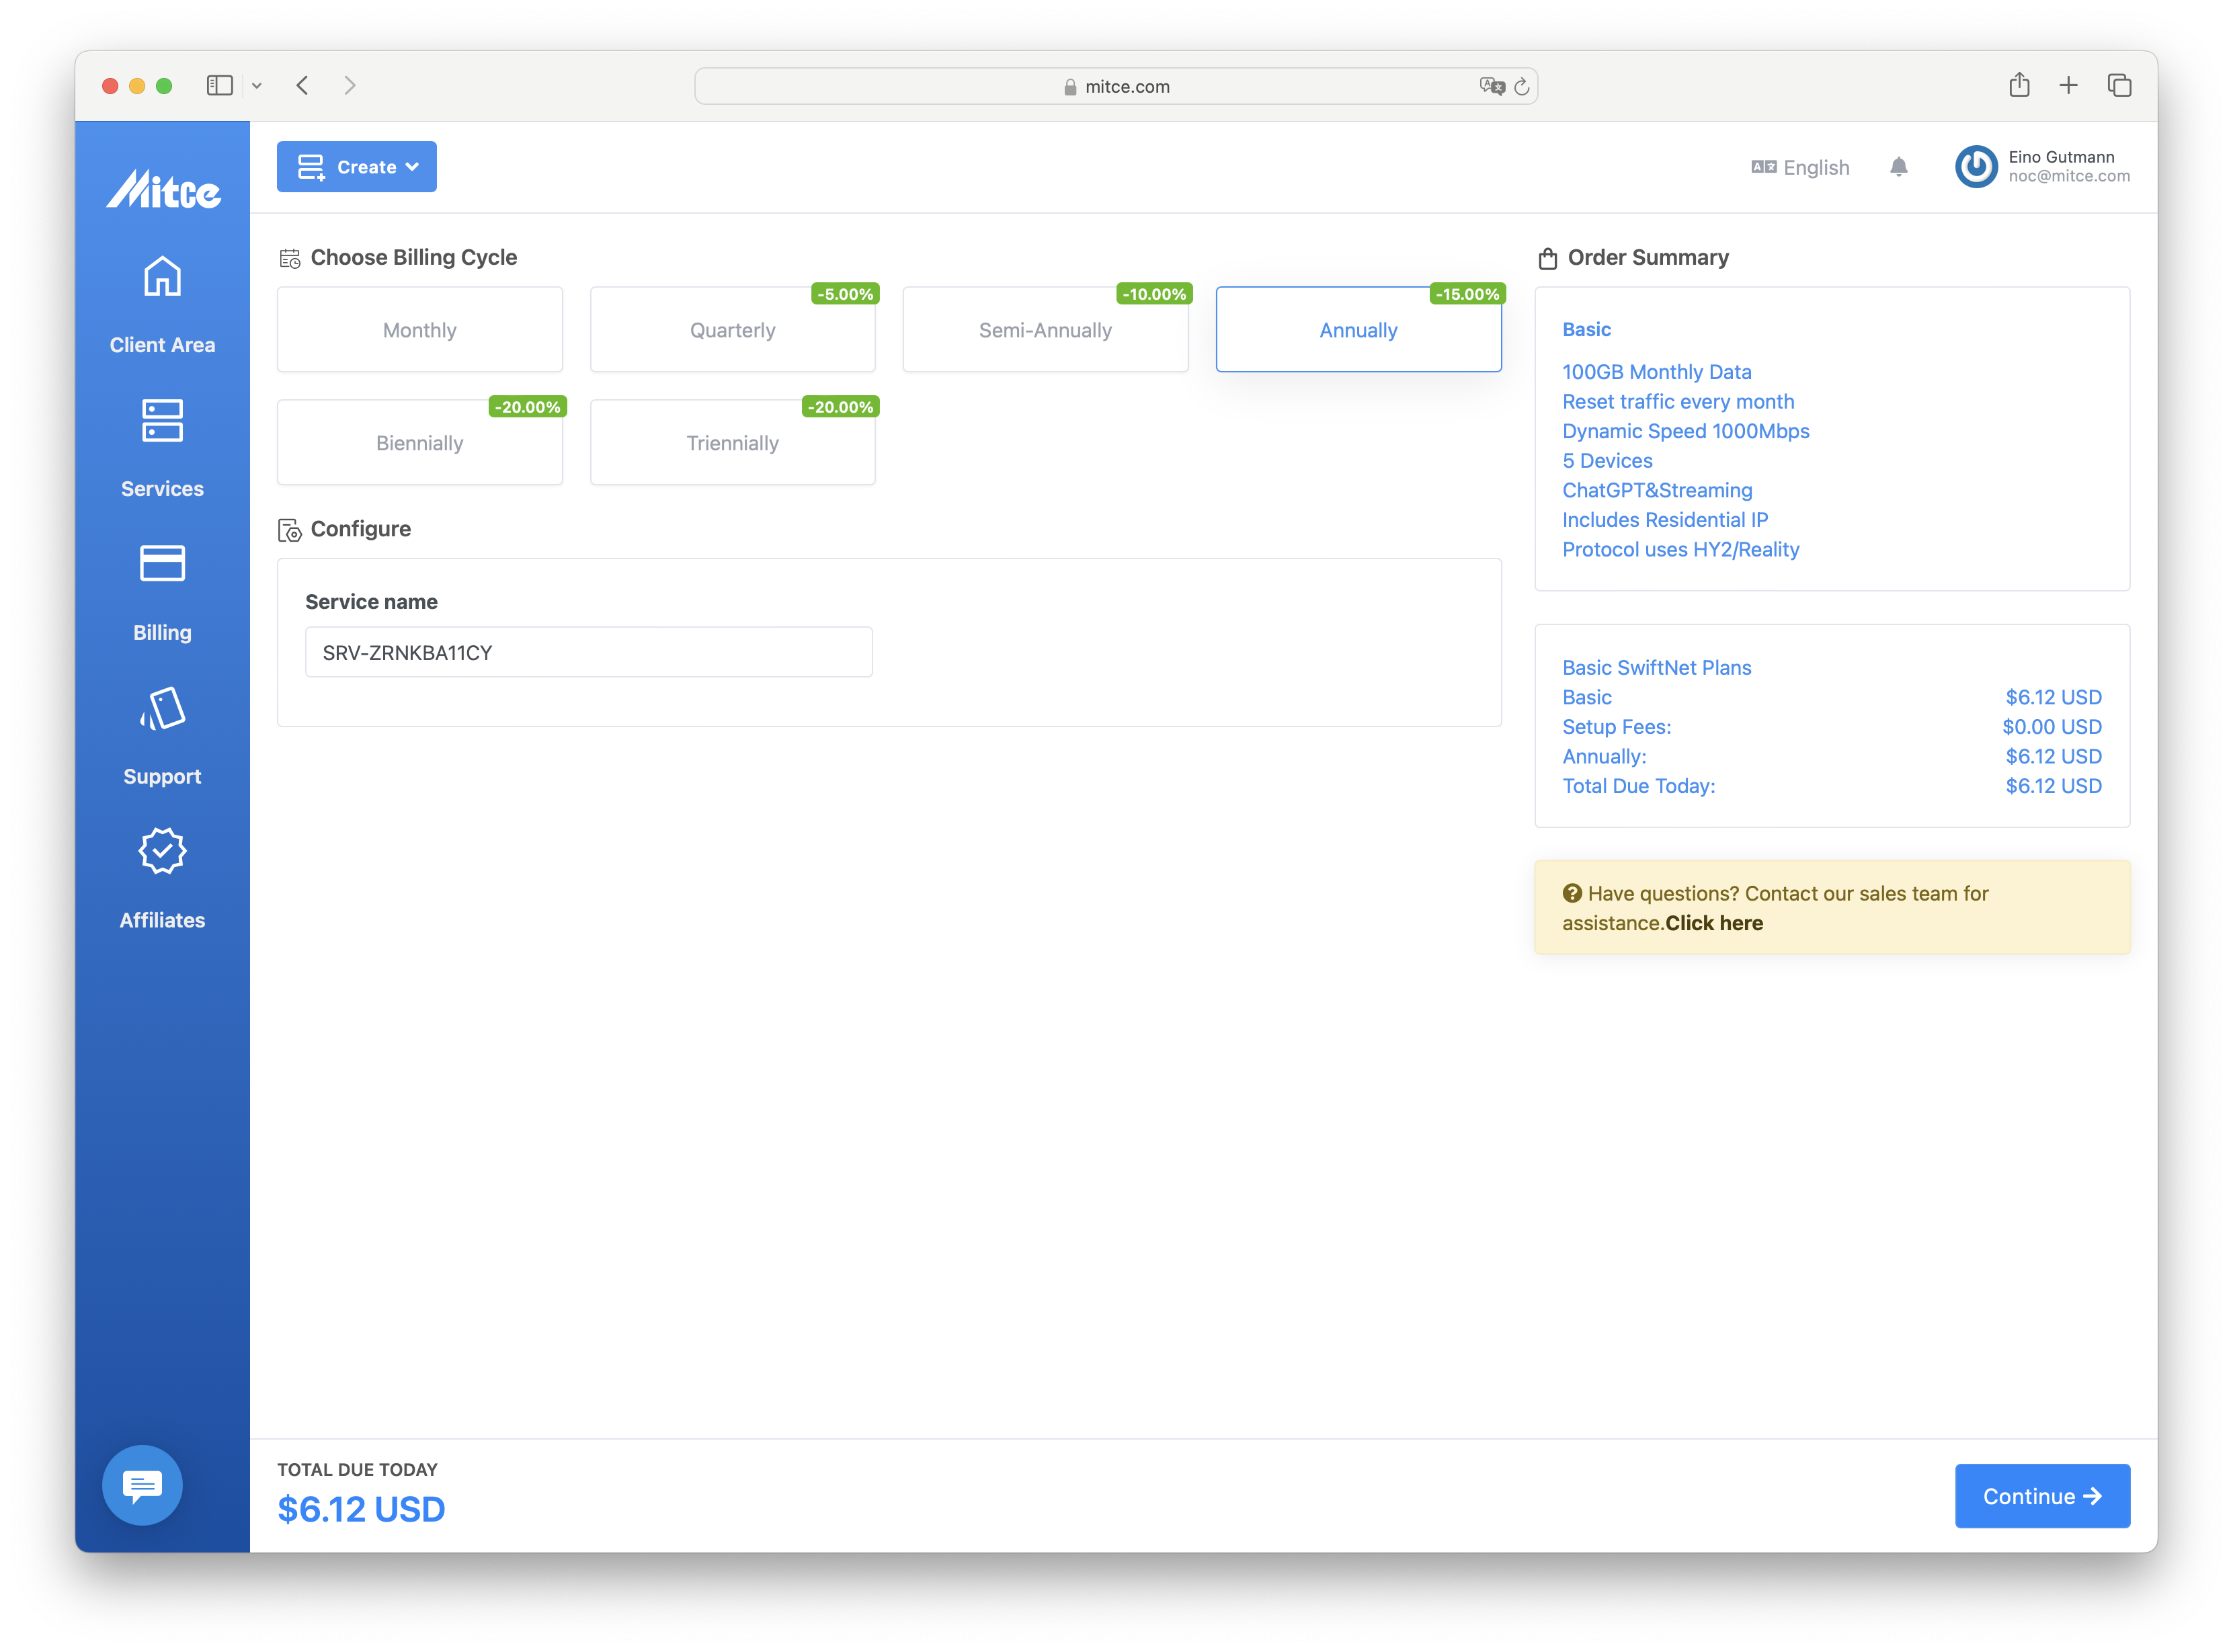
We recommend opting for an annual subscription to take advantage of a 15% discount. Let’s continue and create your order.
Step 3: Review Your Cart
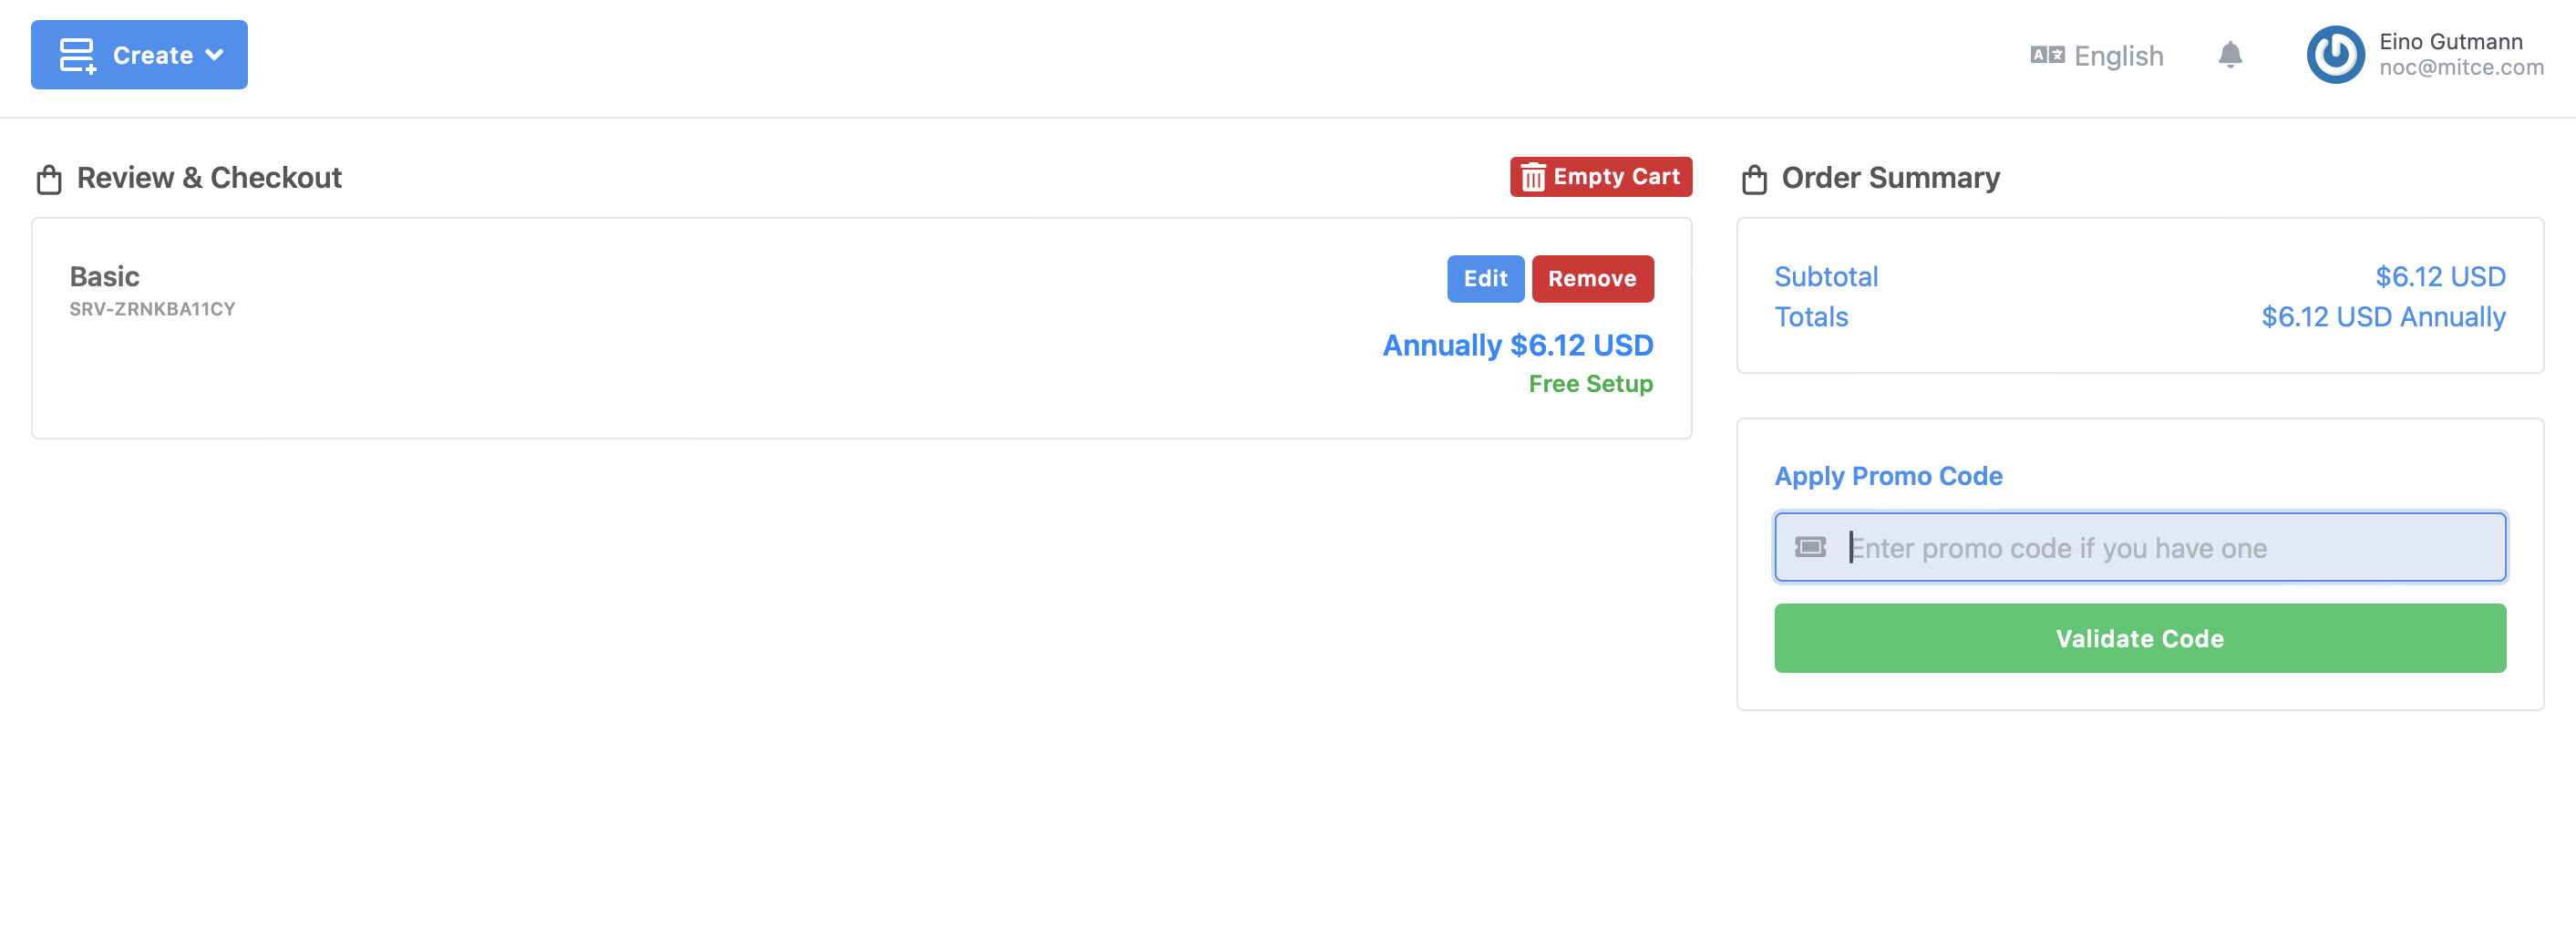
Next, we’ll review your shopping cart. If you wish to purchase additional services, simply click the Create button again to add more products to your cart.
Tip: If you have a coupon code, don’t forget to apply it here!
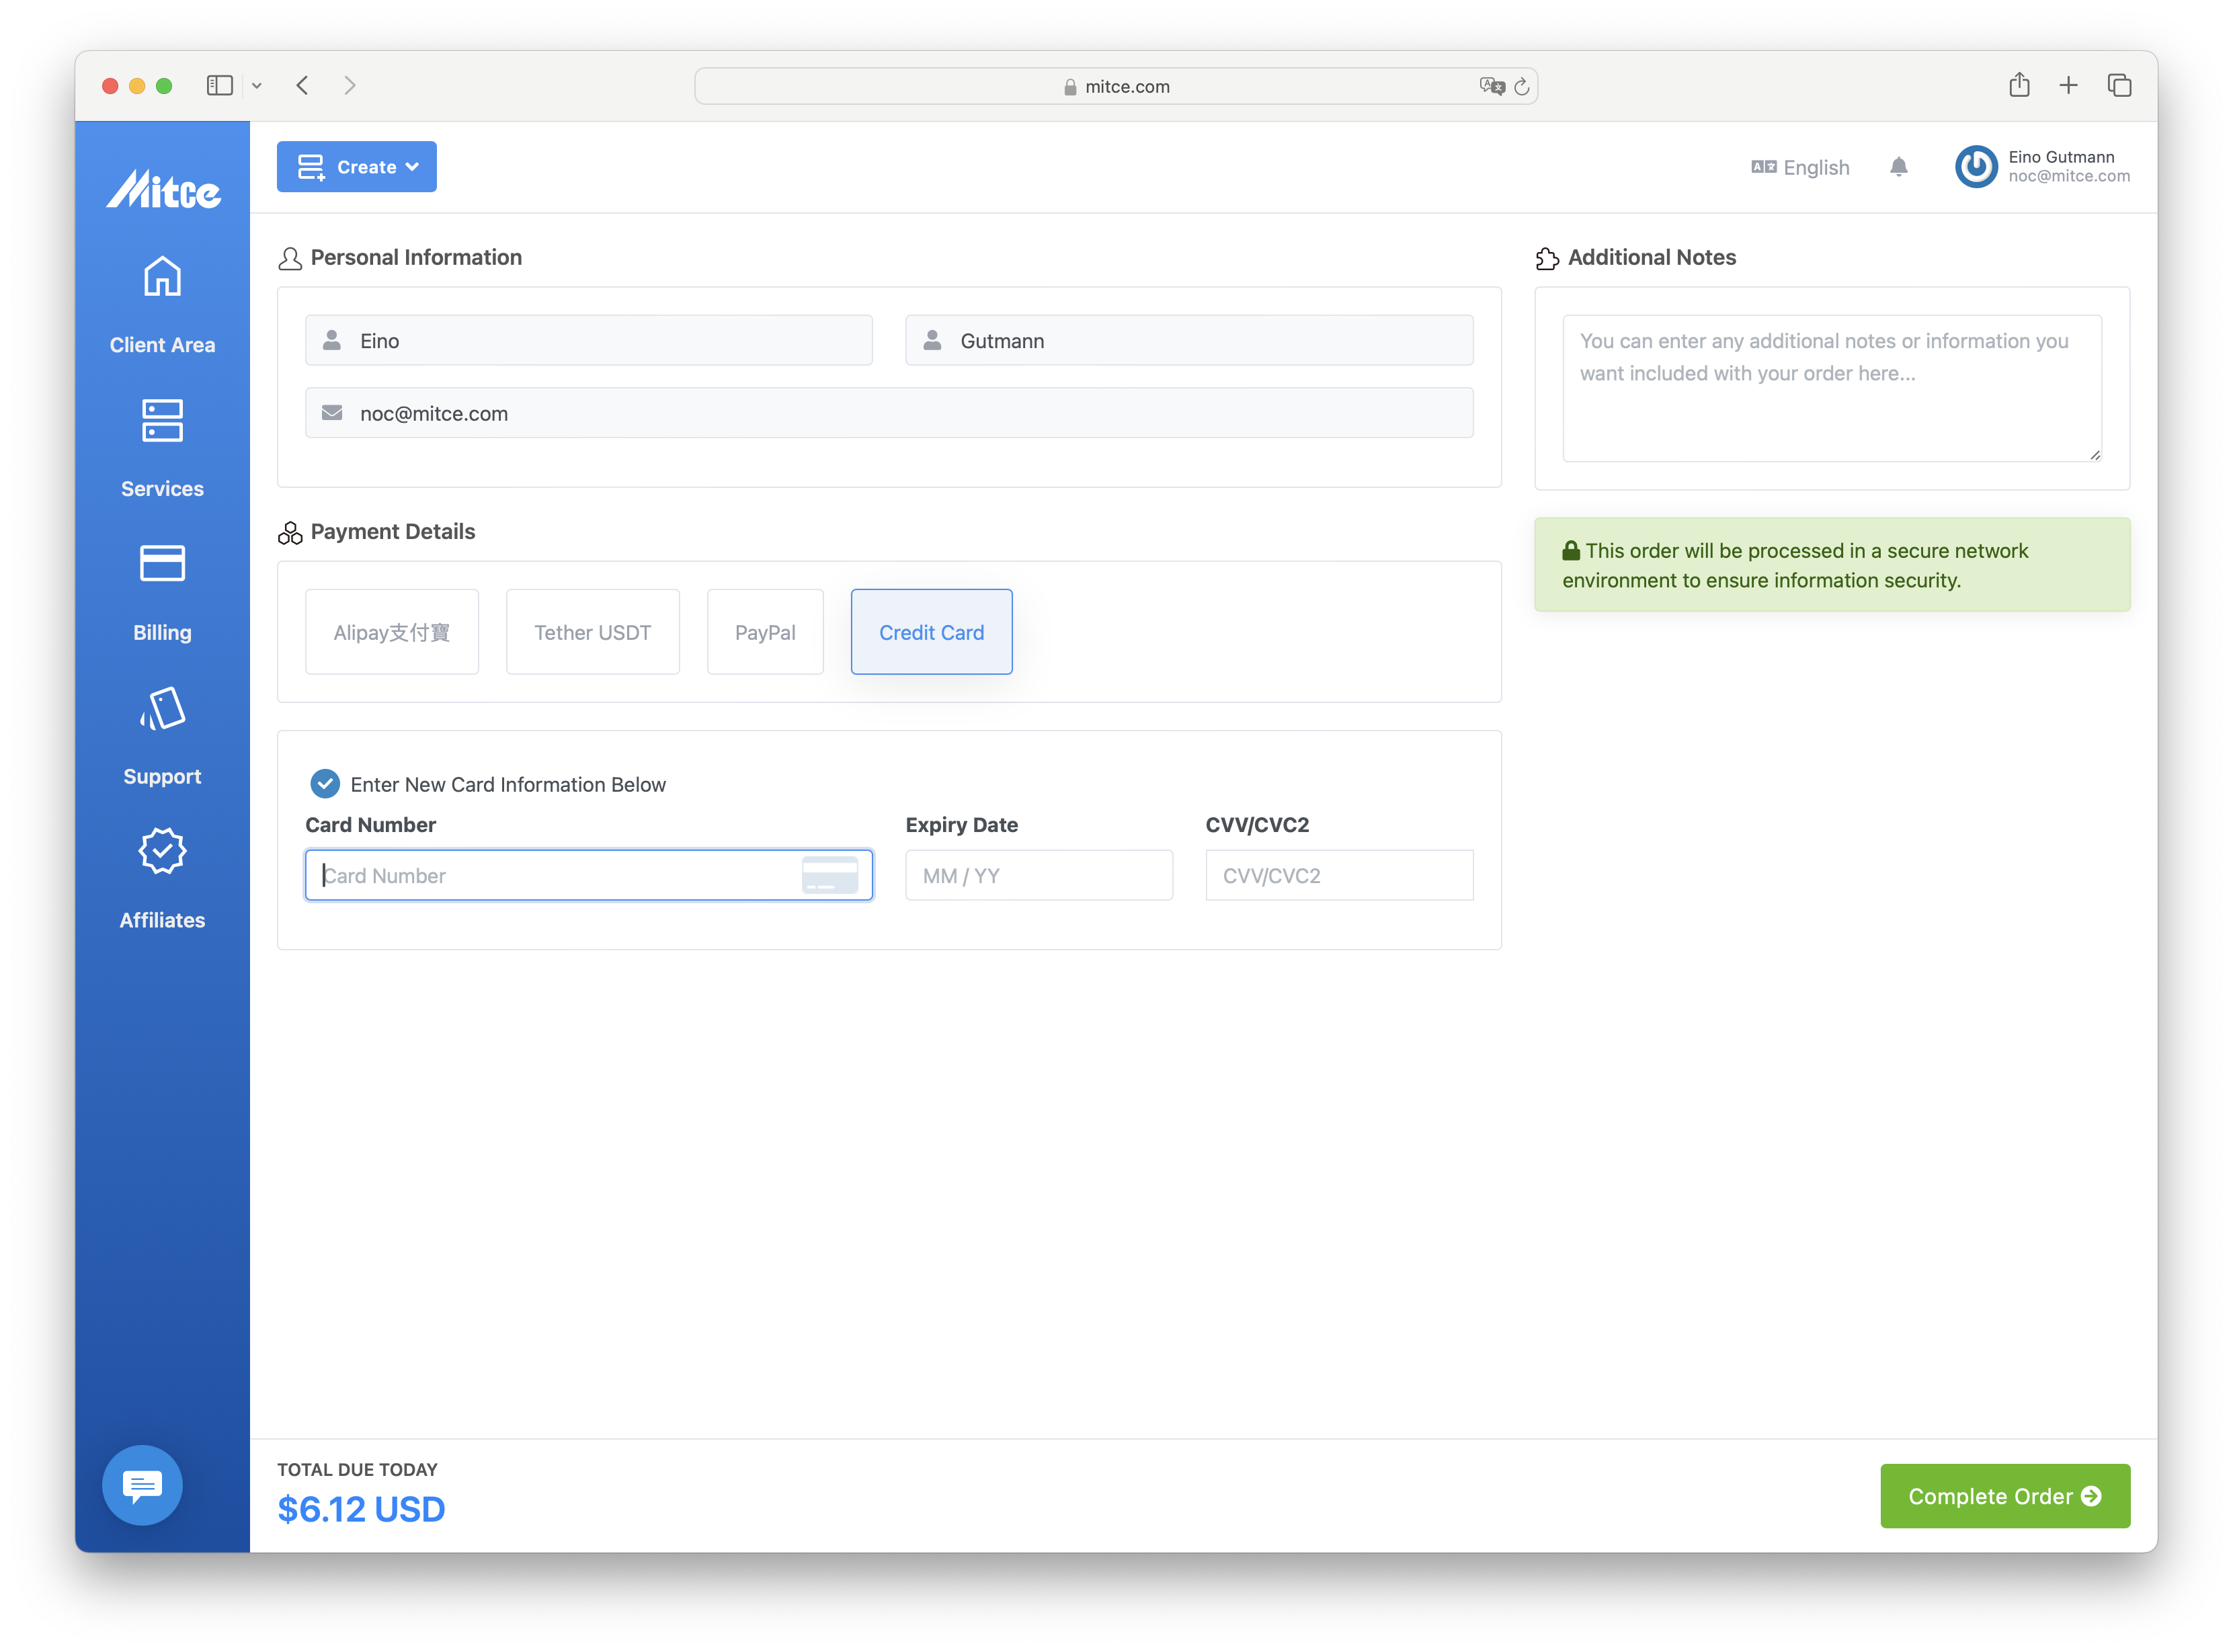
Step 4: Proceed to Checkout
Once you’re ready, proceed to the checkout. In this example, we’ll pay using a credit card, but feel free to select your preferred payment method.
Step 5: Confirm Product Activation
After successful payment, you’ll receive a confirmation email with the activation details. You can then view your activated products in the client area.
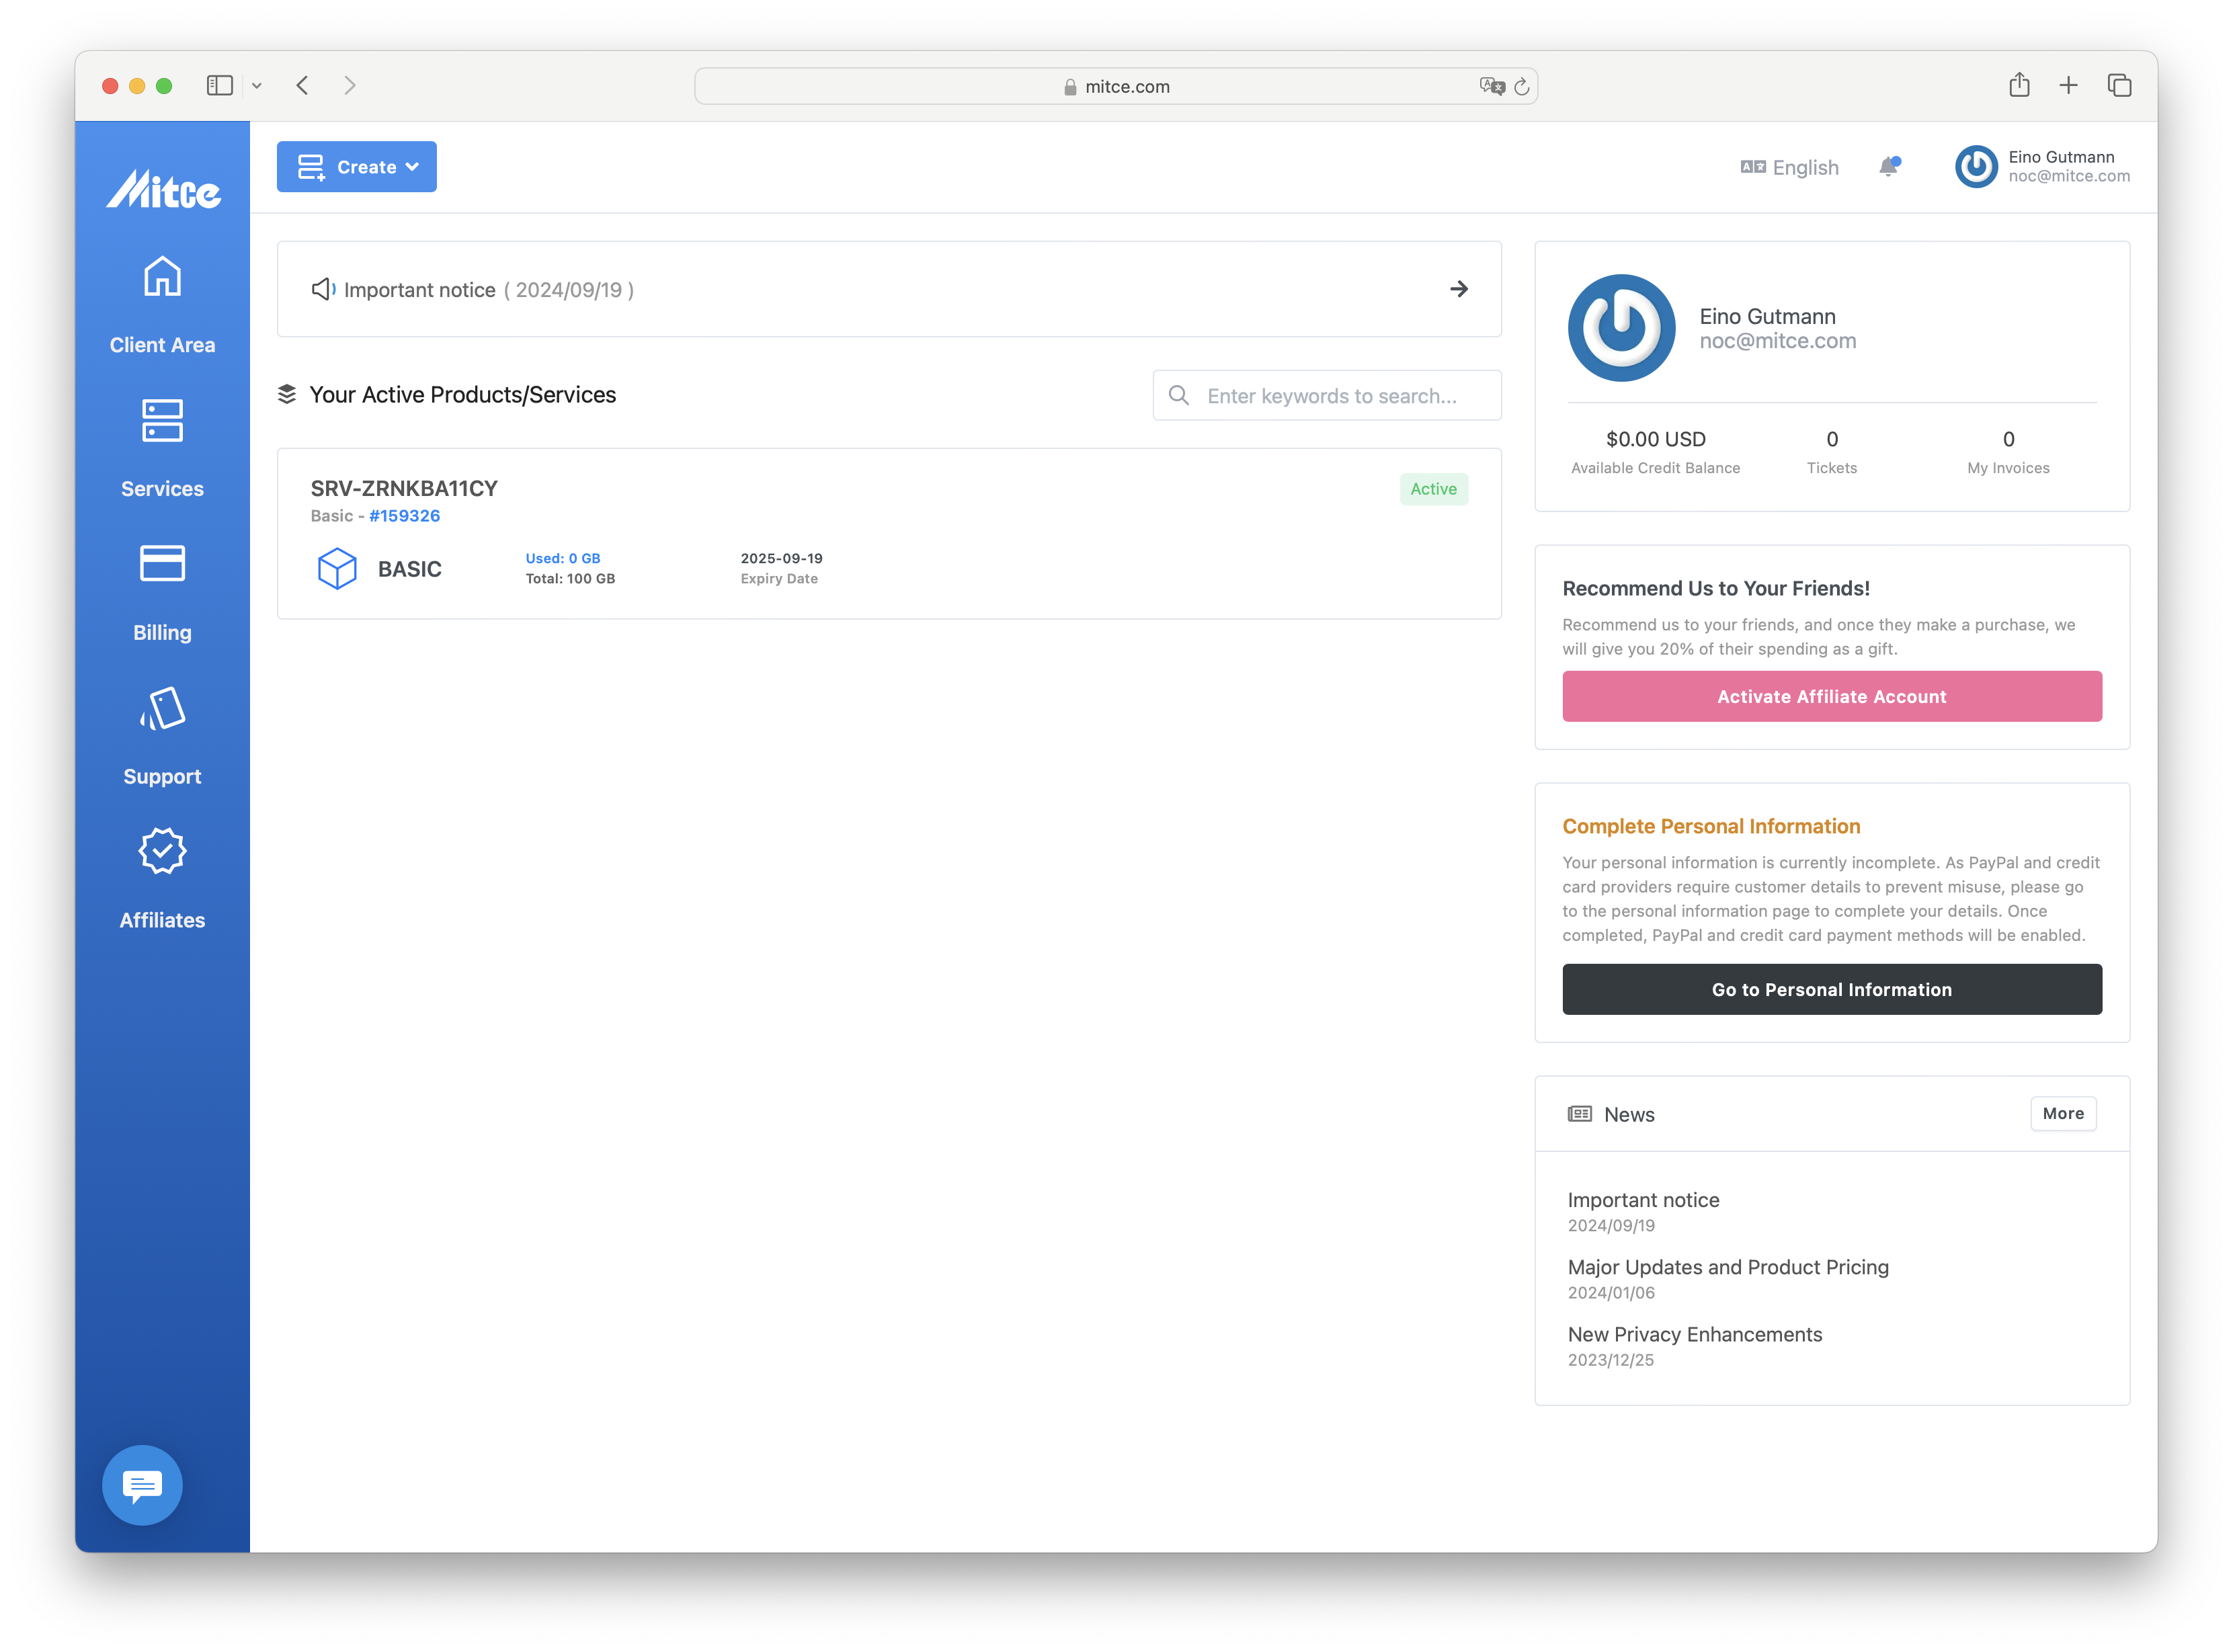
Click on the activated product card to view detailed information about your service.
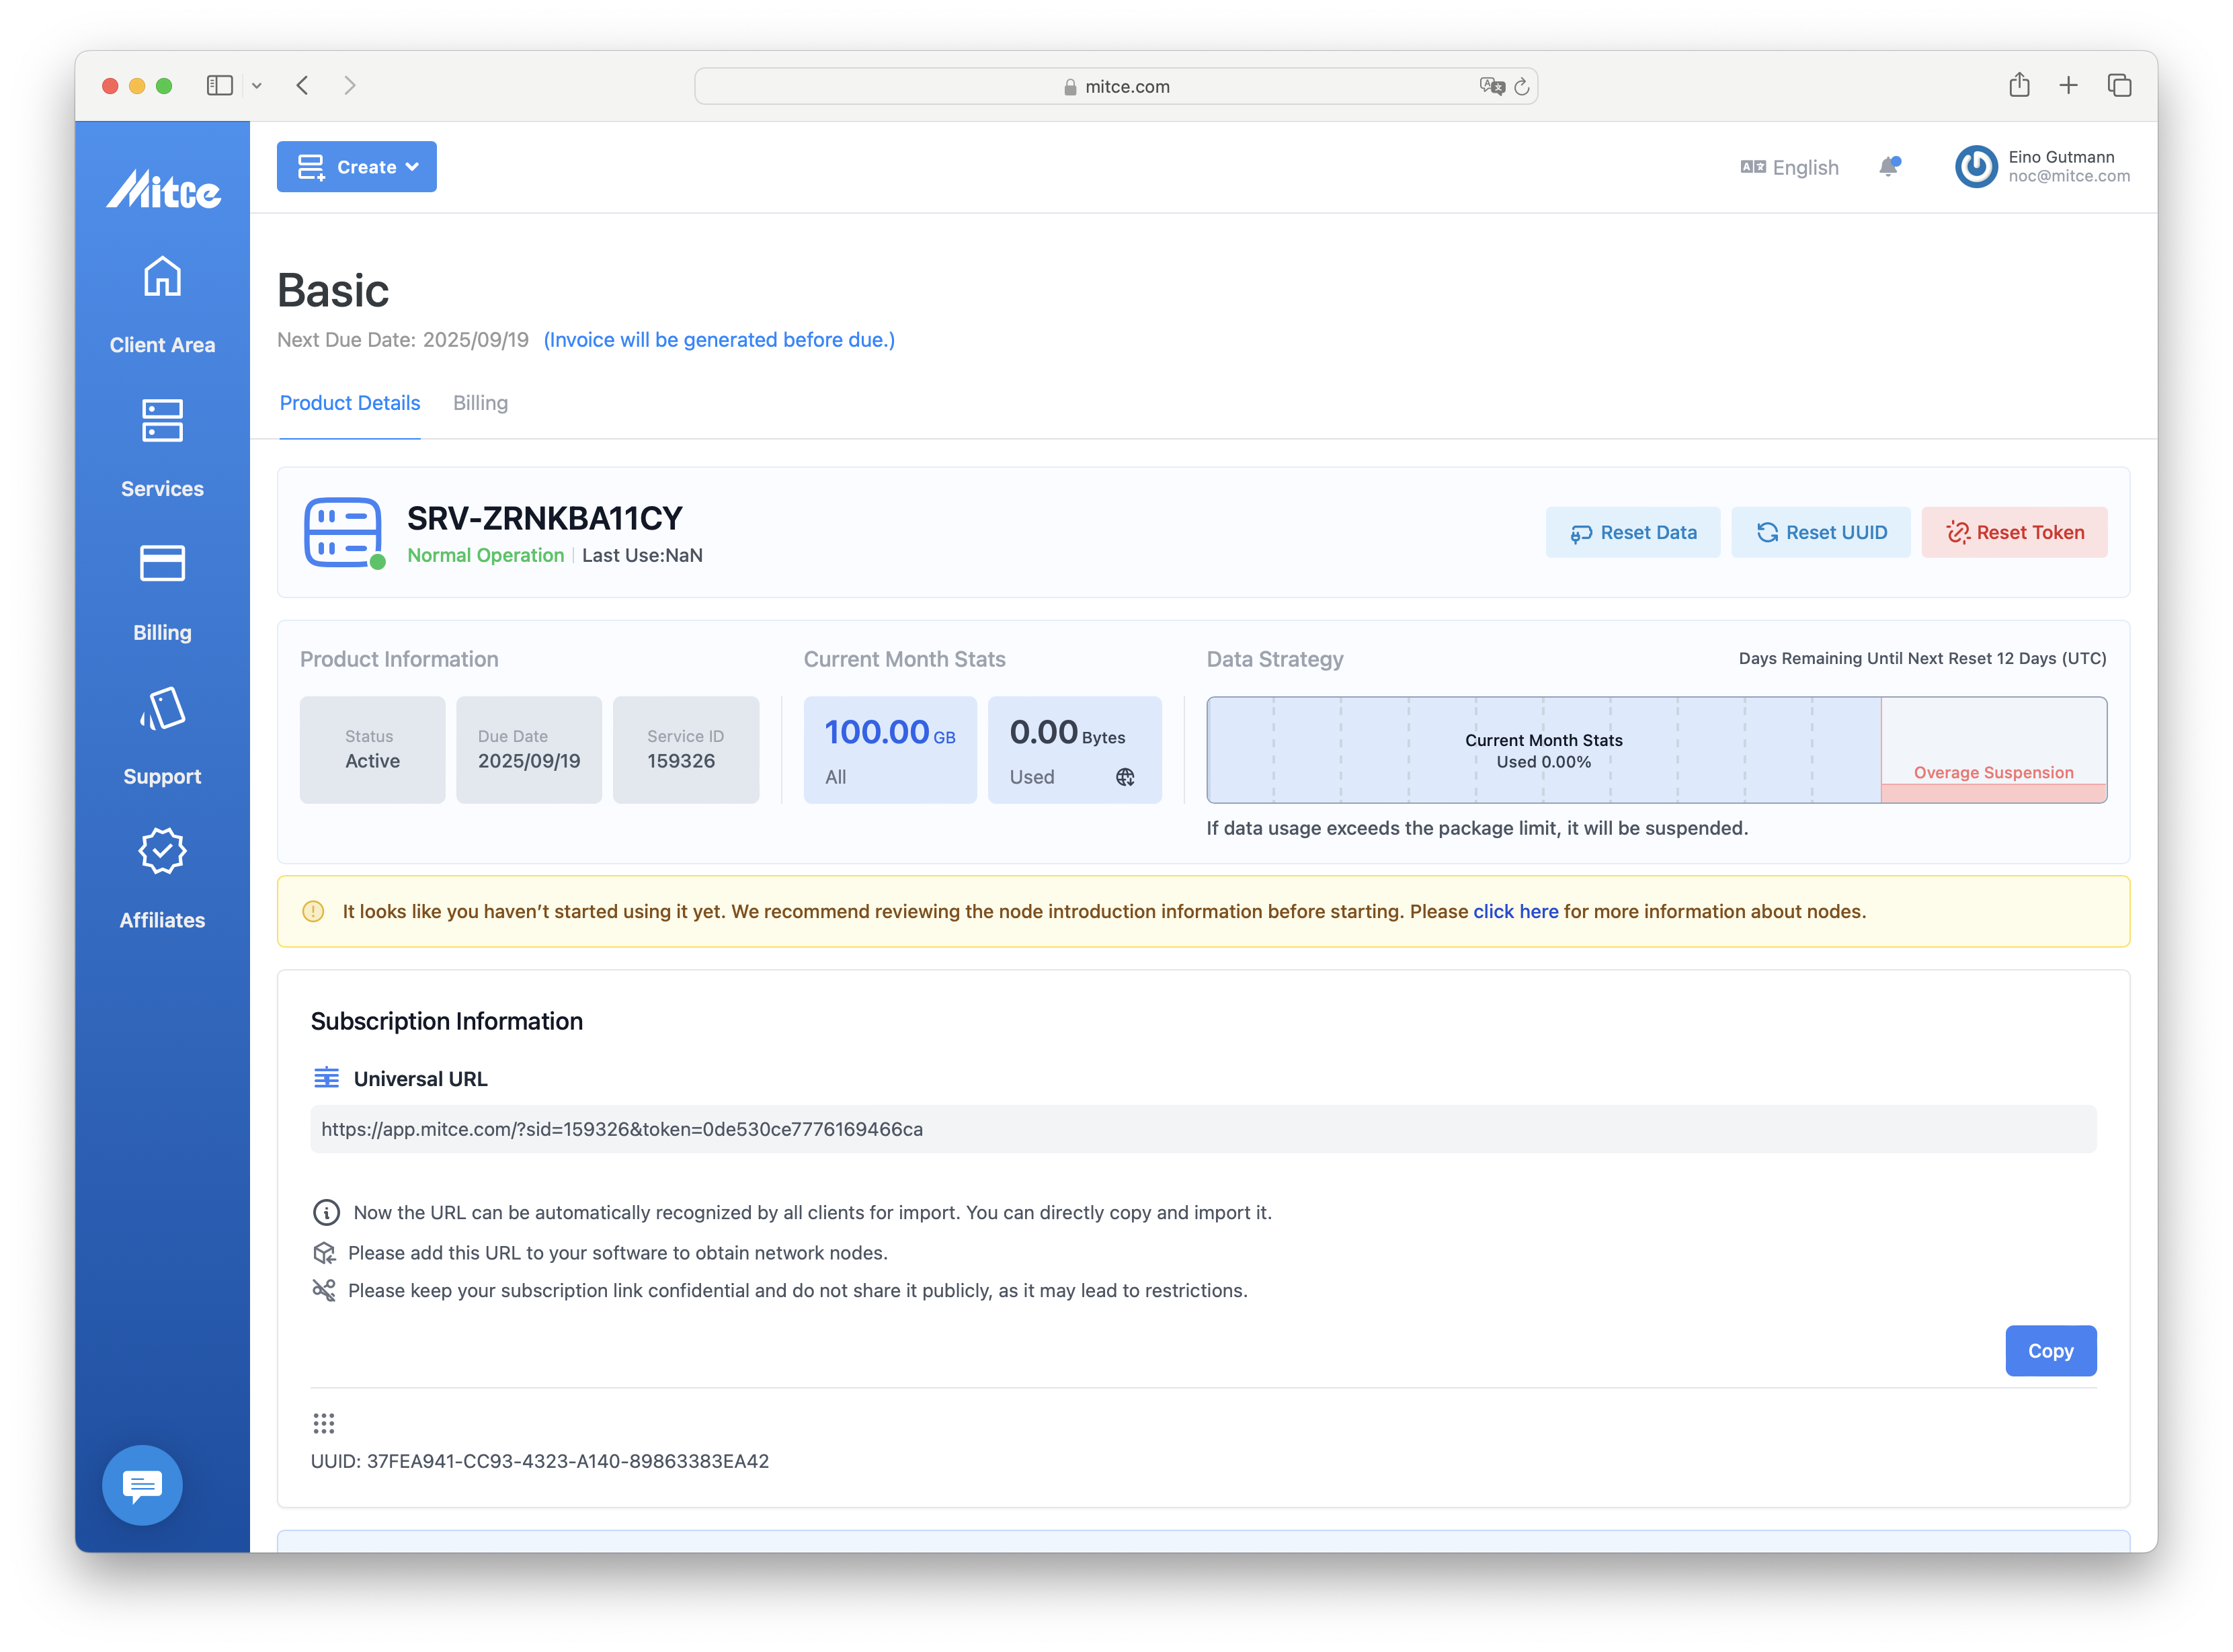
Step 6: Managing Your Subscription
In this section, you’ll see your total bandwidth, the amount consumed, and several important action buttons.
Button Functions:
- Reset Bandwidth - Resets your bandwidth usage, allowing you to fully utilize it again within the same month.
- Reset UUID - If your subscription is accessed without authorization, click this to reset the UUID, ensuring a new configuration is required for access.
- Reset Token - If your subscription link is compromised, click this to invalidate the old link and generate a new one.
If your subscription is leaked or bandwidth usage is suspiciously high, reset both the UUID and Token to prevent unauthorized access.
Step 7: Retrieve Your Node URL
Next, locate the long URL in your product details. This URL is essential for importing nodes into your client application.
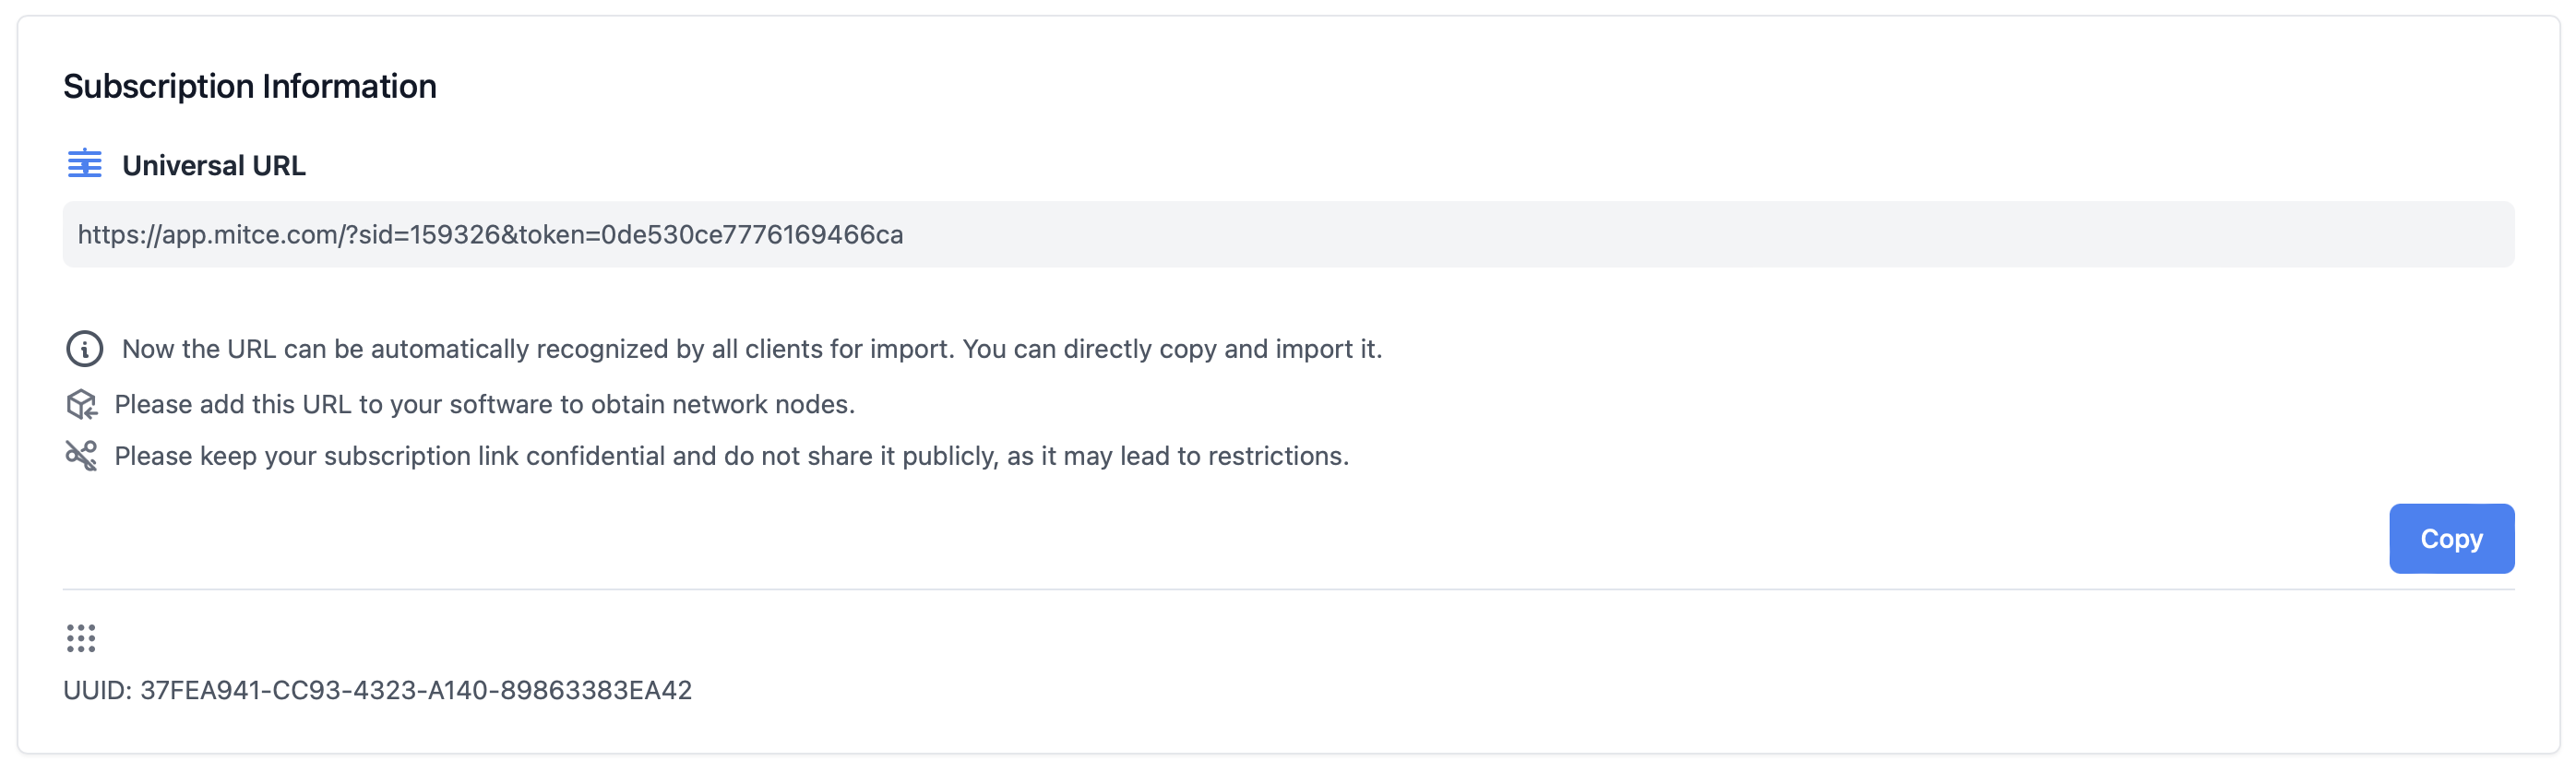
Simply click the Copy button and paste it into your preferred client software. If you encounter any issues importing the URL, refer to our article on Supported Client Software.
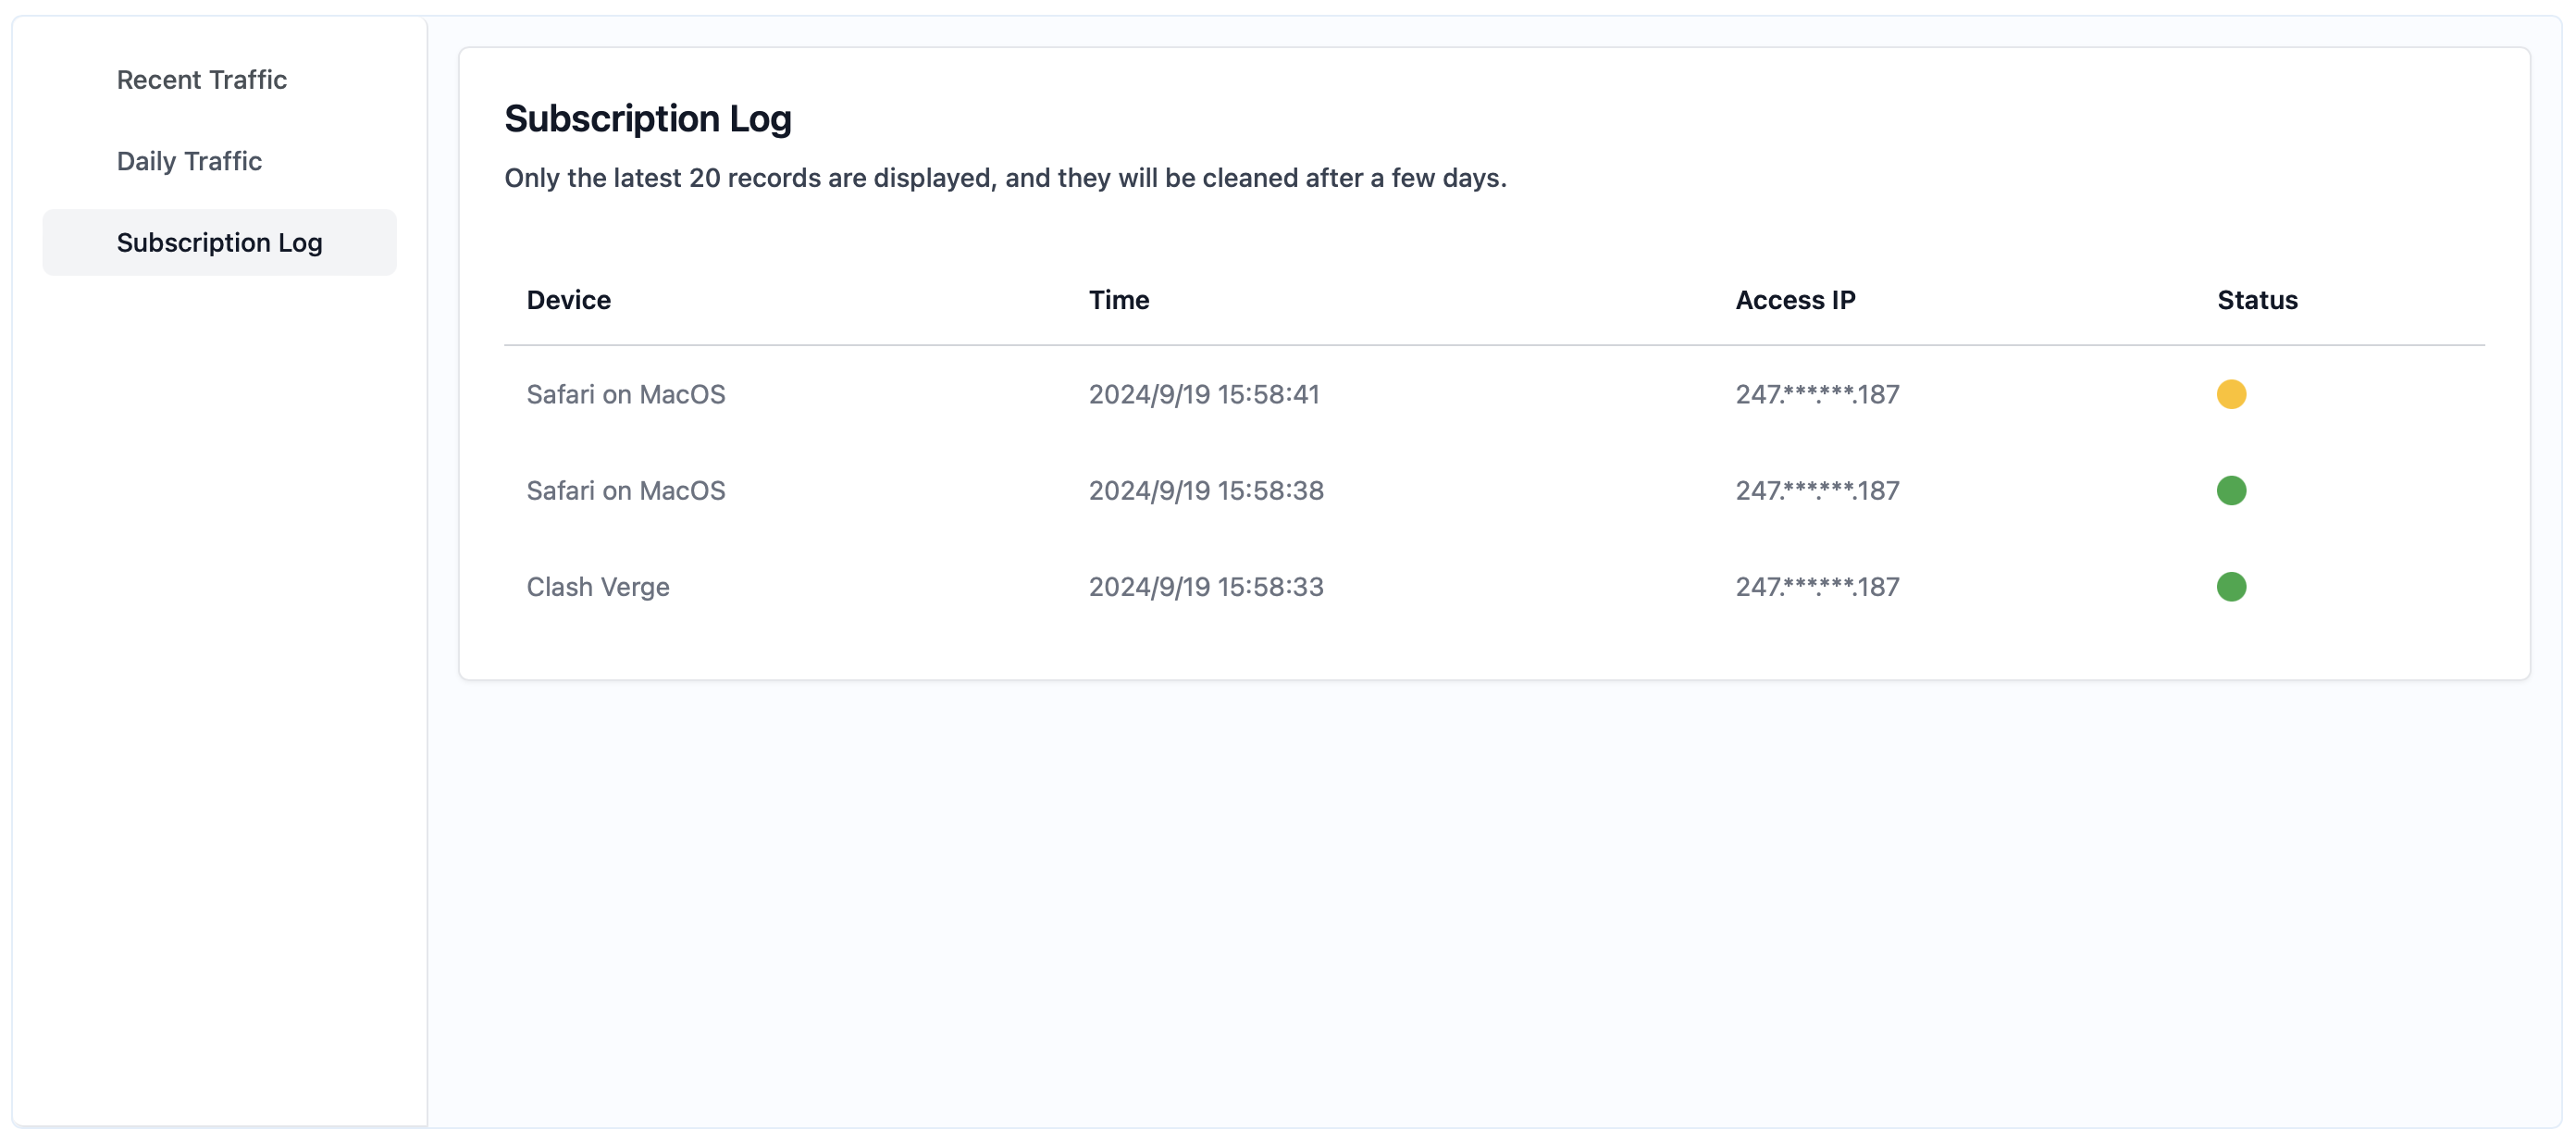
Step 8: Track Your Data Usage
Scroll down to see your usage logs. Data usage is divided into upload and download traffic. The left sidebar shows recent traffic and daily statistics.
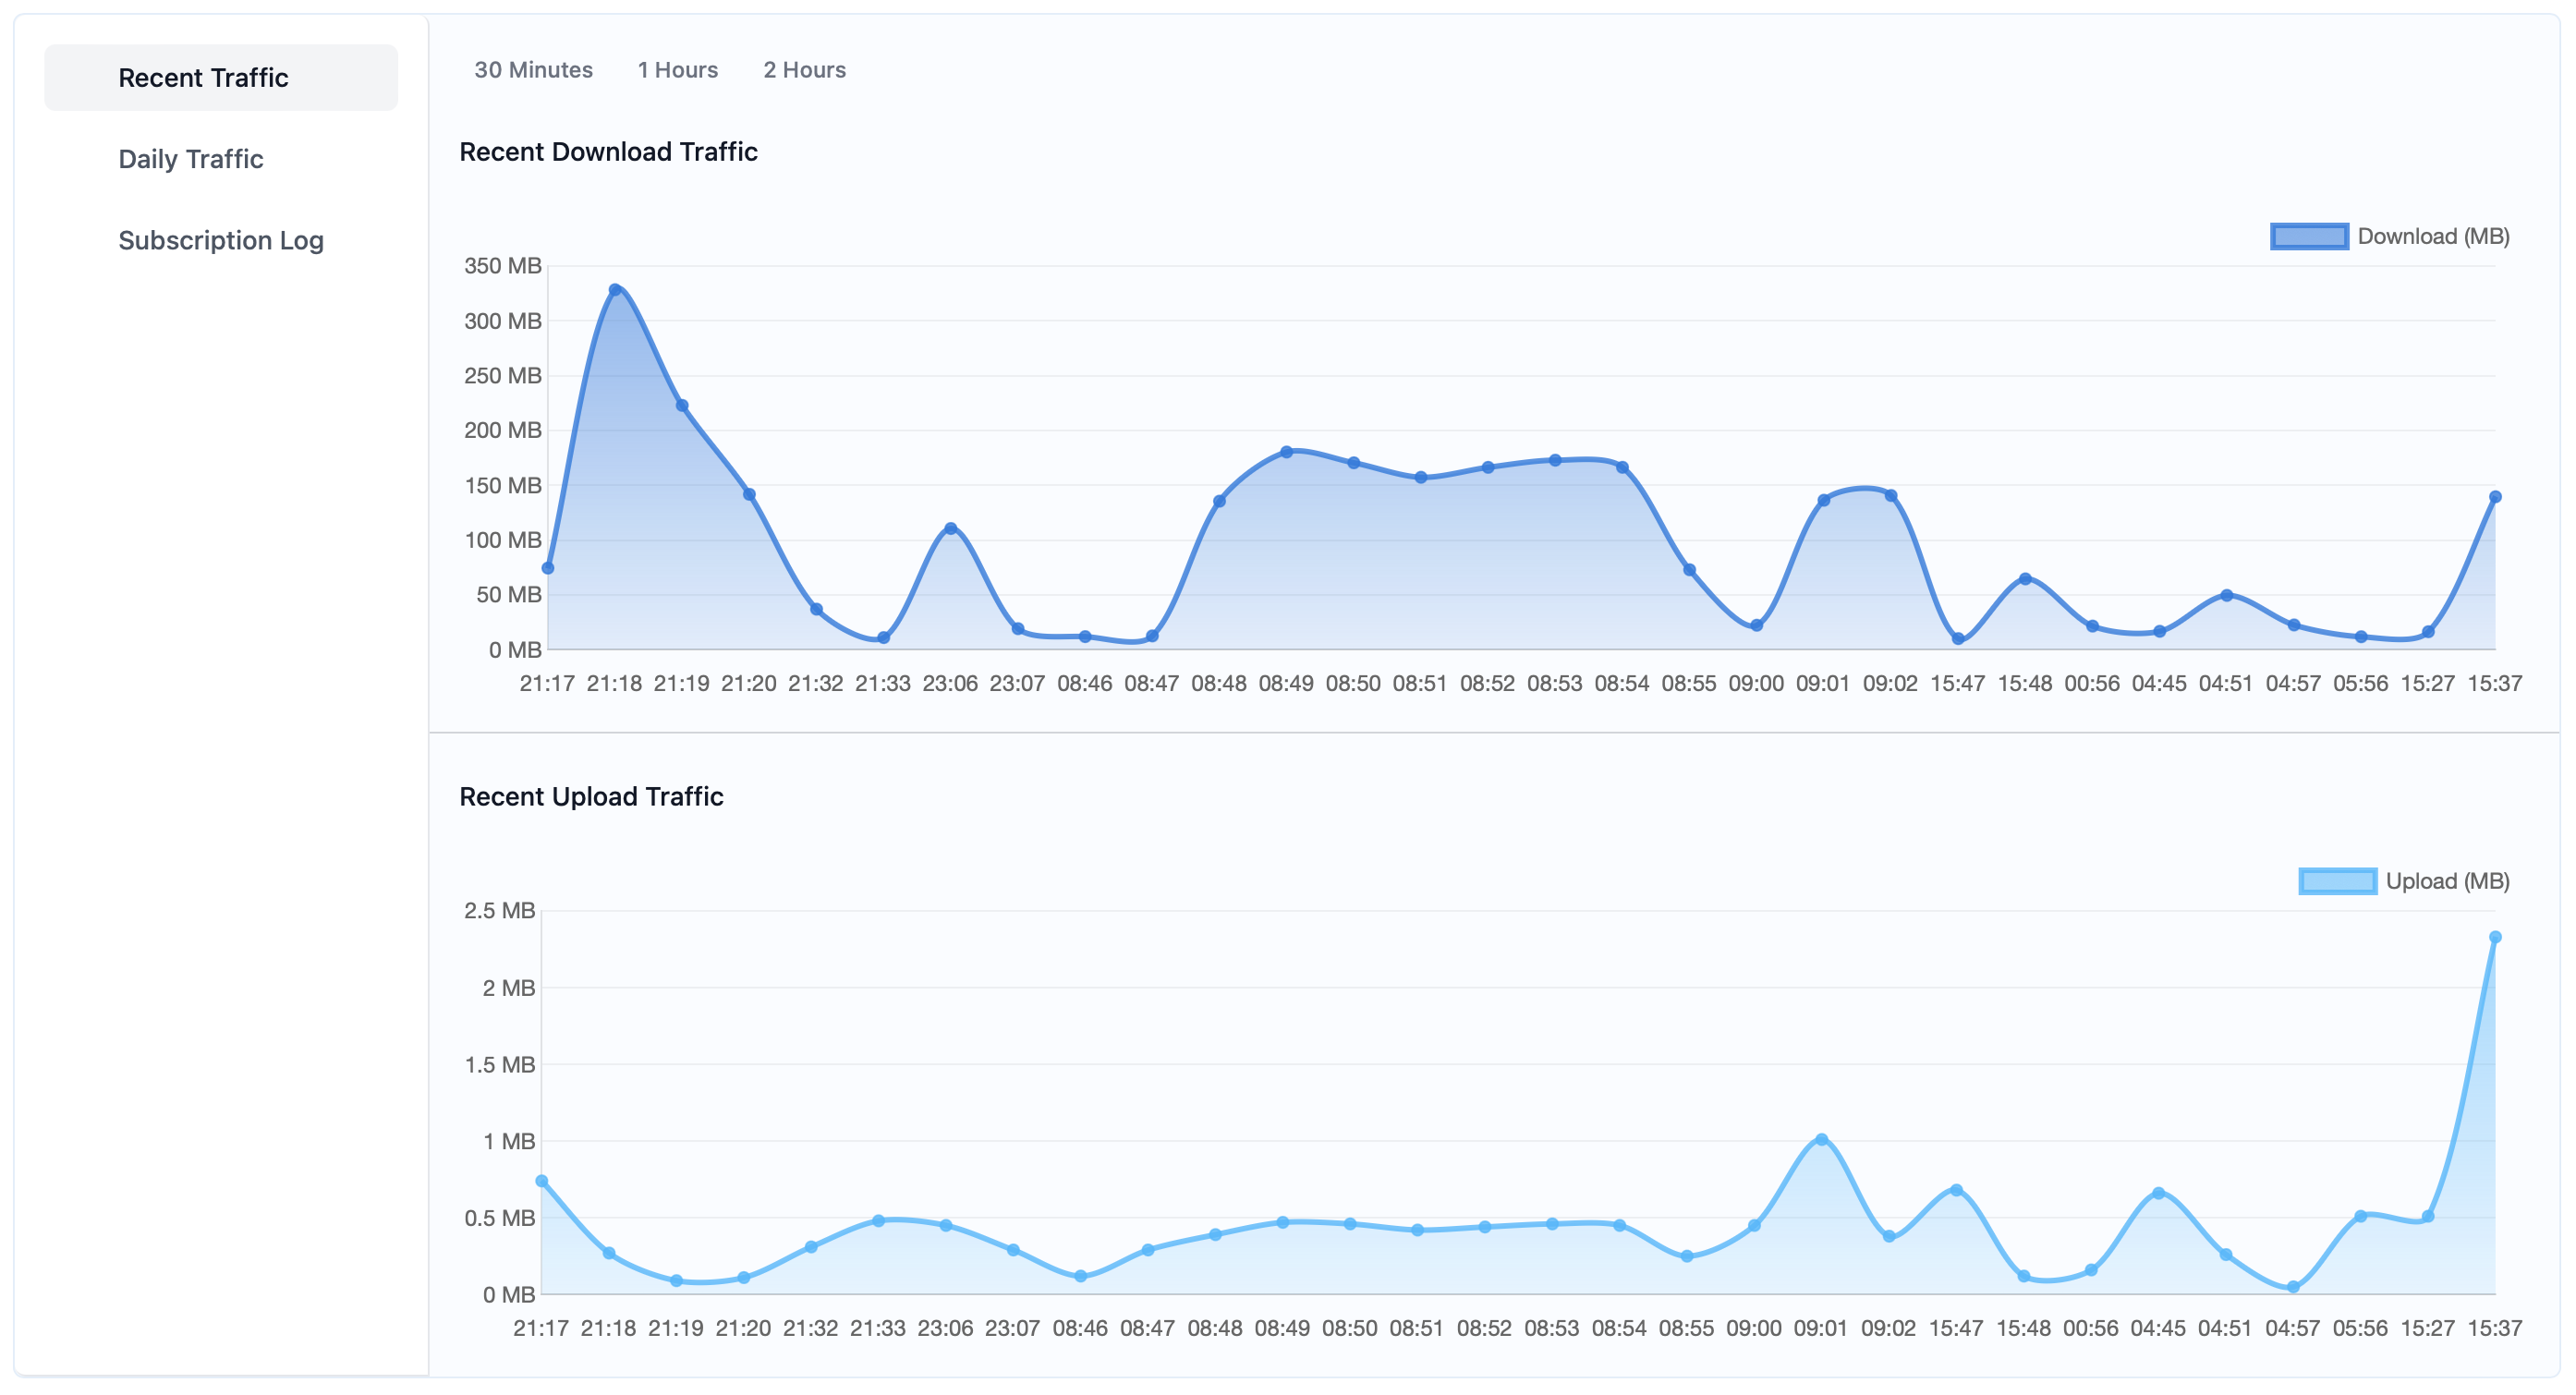
Most importantly, if your URL is accessed, a log will be generated here. The system encrypts IP addresses to prevent anyone from seeing the full details.
Step 9: Monitor for Subscription Leaks
If you notice any red alerts, such as a 99% chance of a subscription leak, reset your UUID and Token immediately to protect your bandwidth.
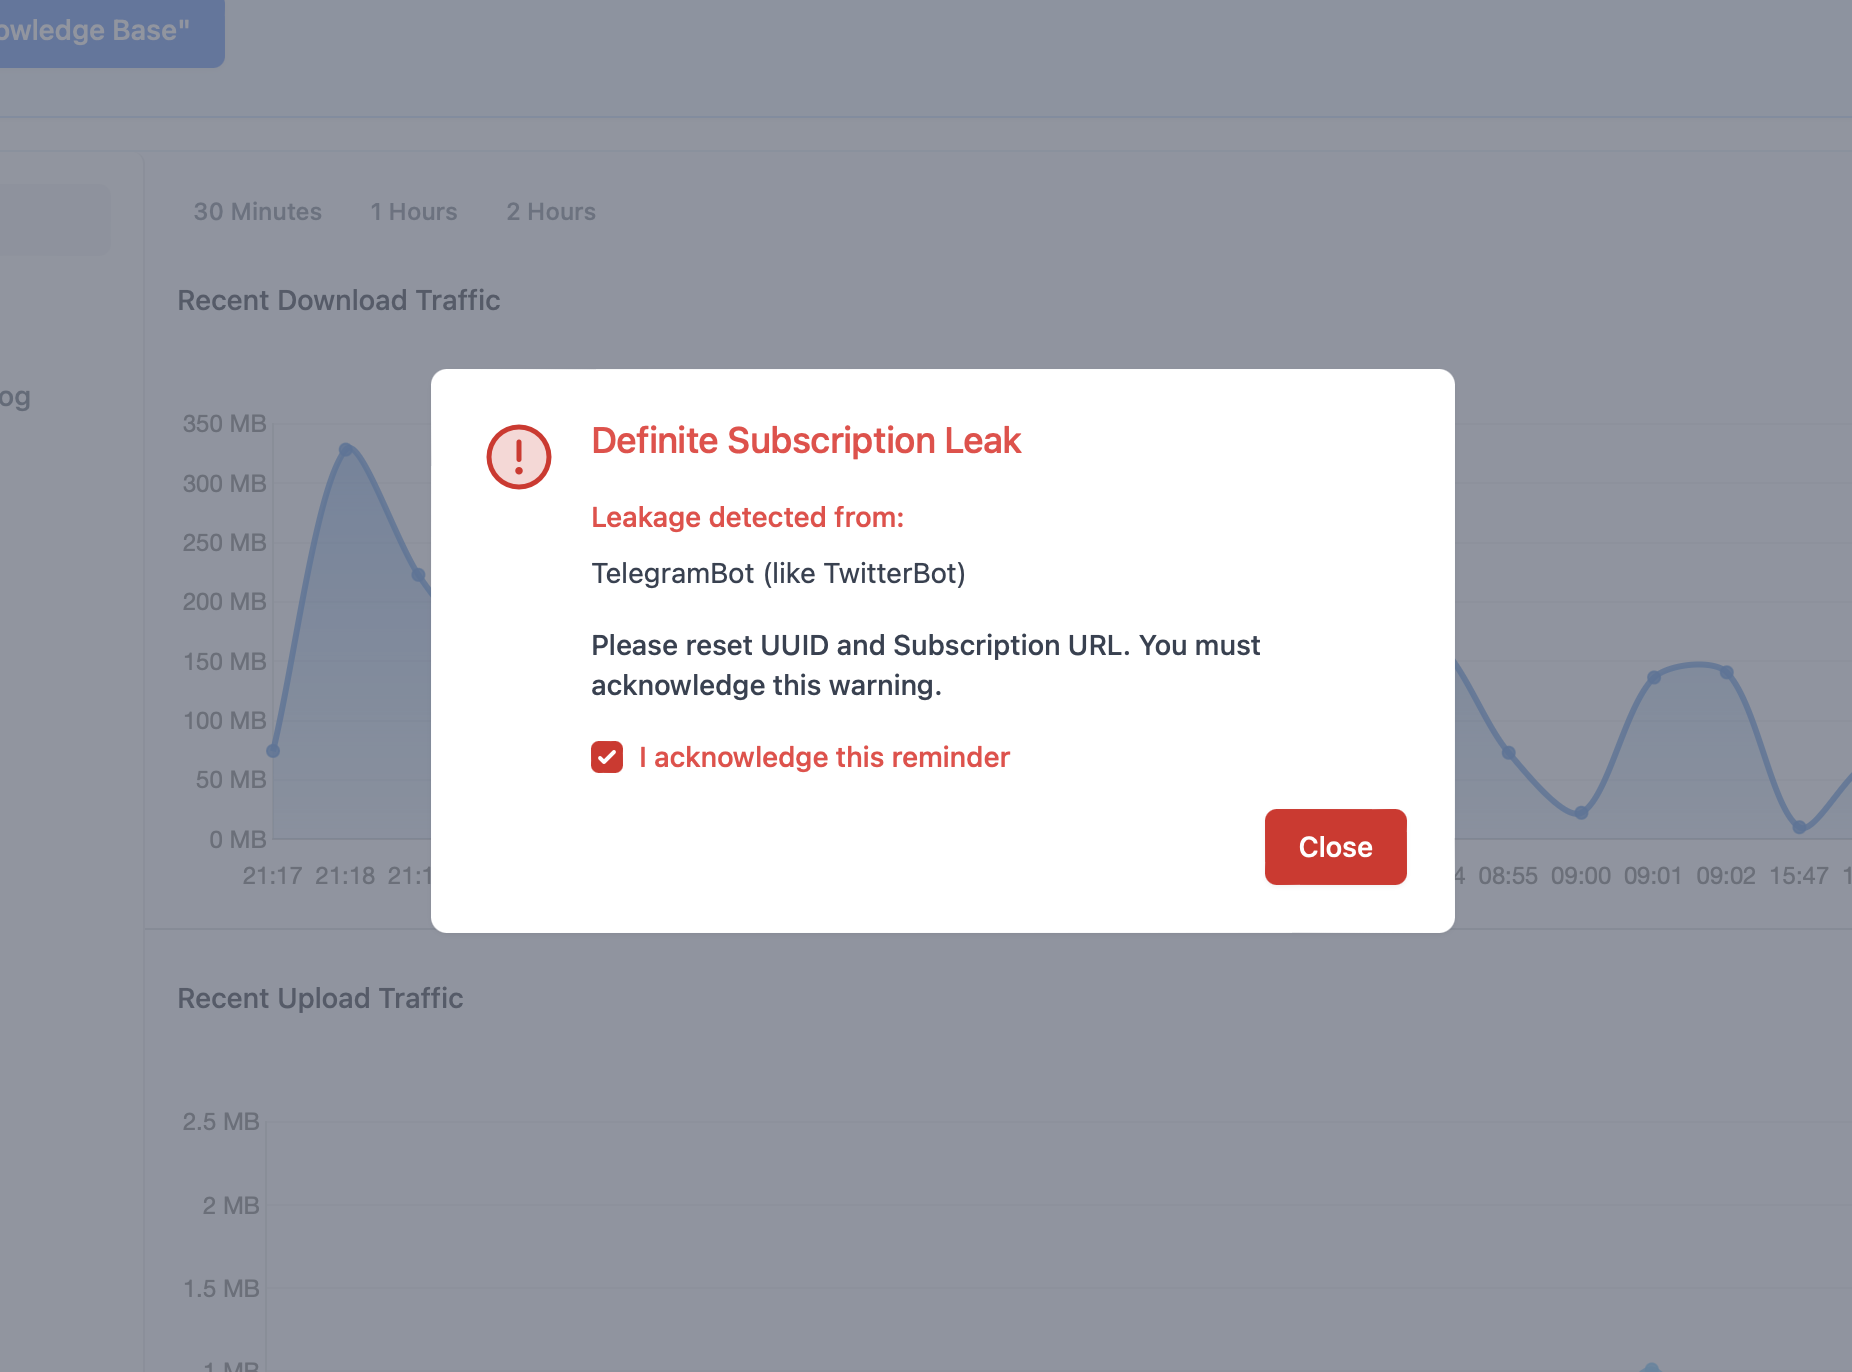
Note: Frequent leak alerts may result in automatic throttling or suspension of your account if deemed as misuse.
Step 10: Check Available Nodes
Next, you’ll see a list of available nodes. In some cases, all users have access to the same nodes, but for experimental nodes, updates may be rolled out to specific subscription plans in stages to ensure availability.

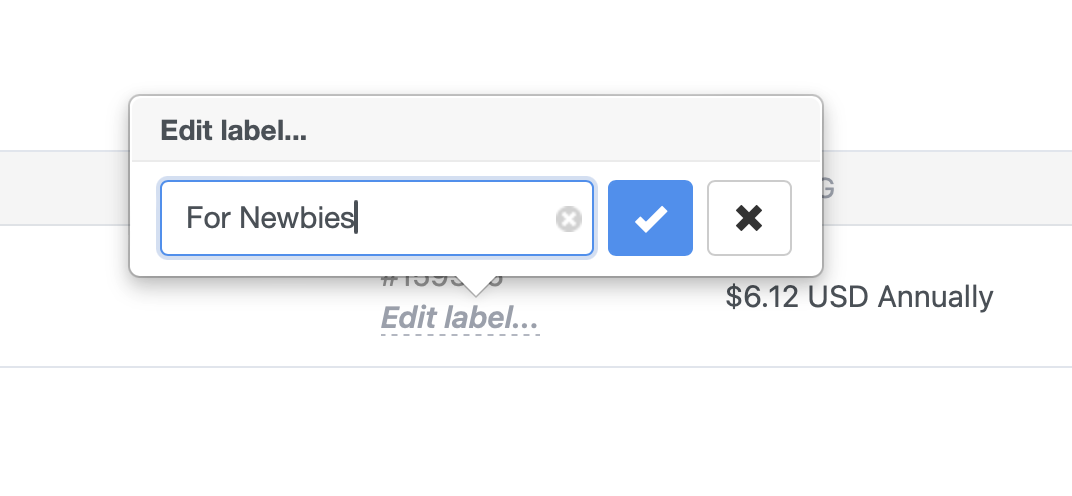
Step 11: Use Product Tags for Better Organization
If you have many products, you can assign unique labels to each one. Click My Products and select Edit Label. For example, you could label a product as "Beginner Plan" to differentiate it easily.
Step 12: Renewing Your Products
Many new users often wonder how to renew their products. It’s simple. In your product details, you’ll see the statement "Invoice will be generated before due." This means the system will automatically create a renewal invoice before your product expires.
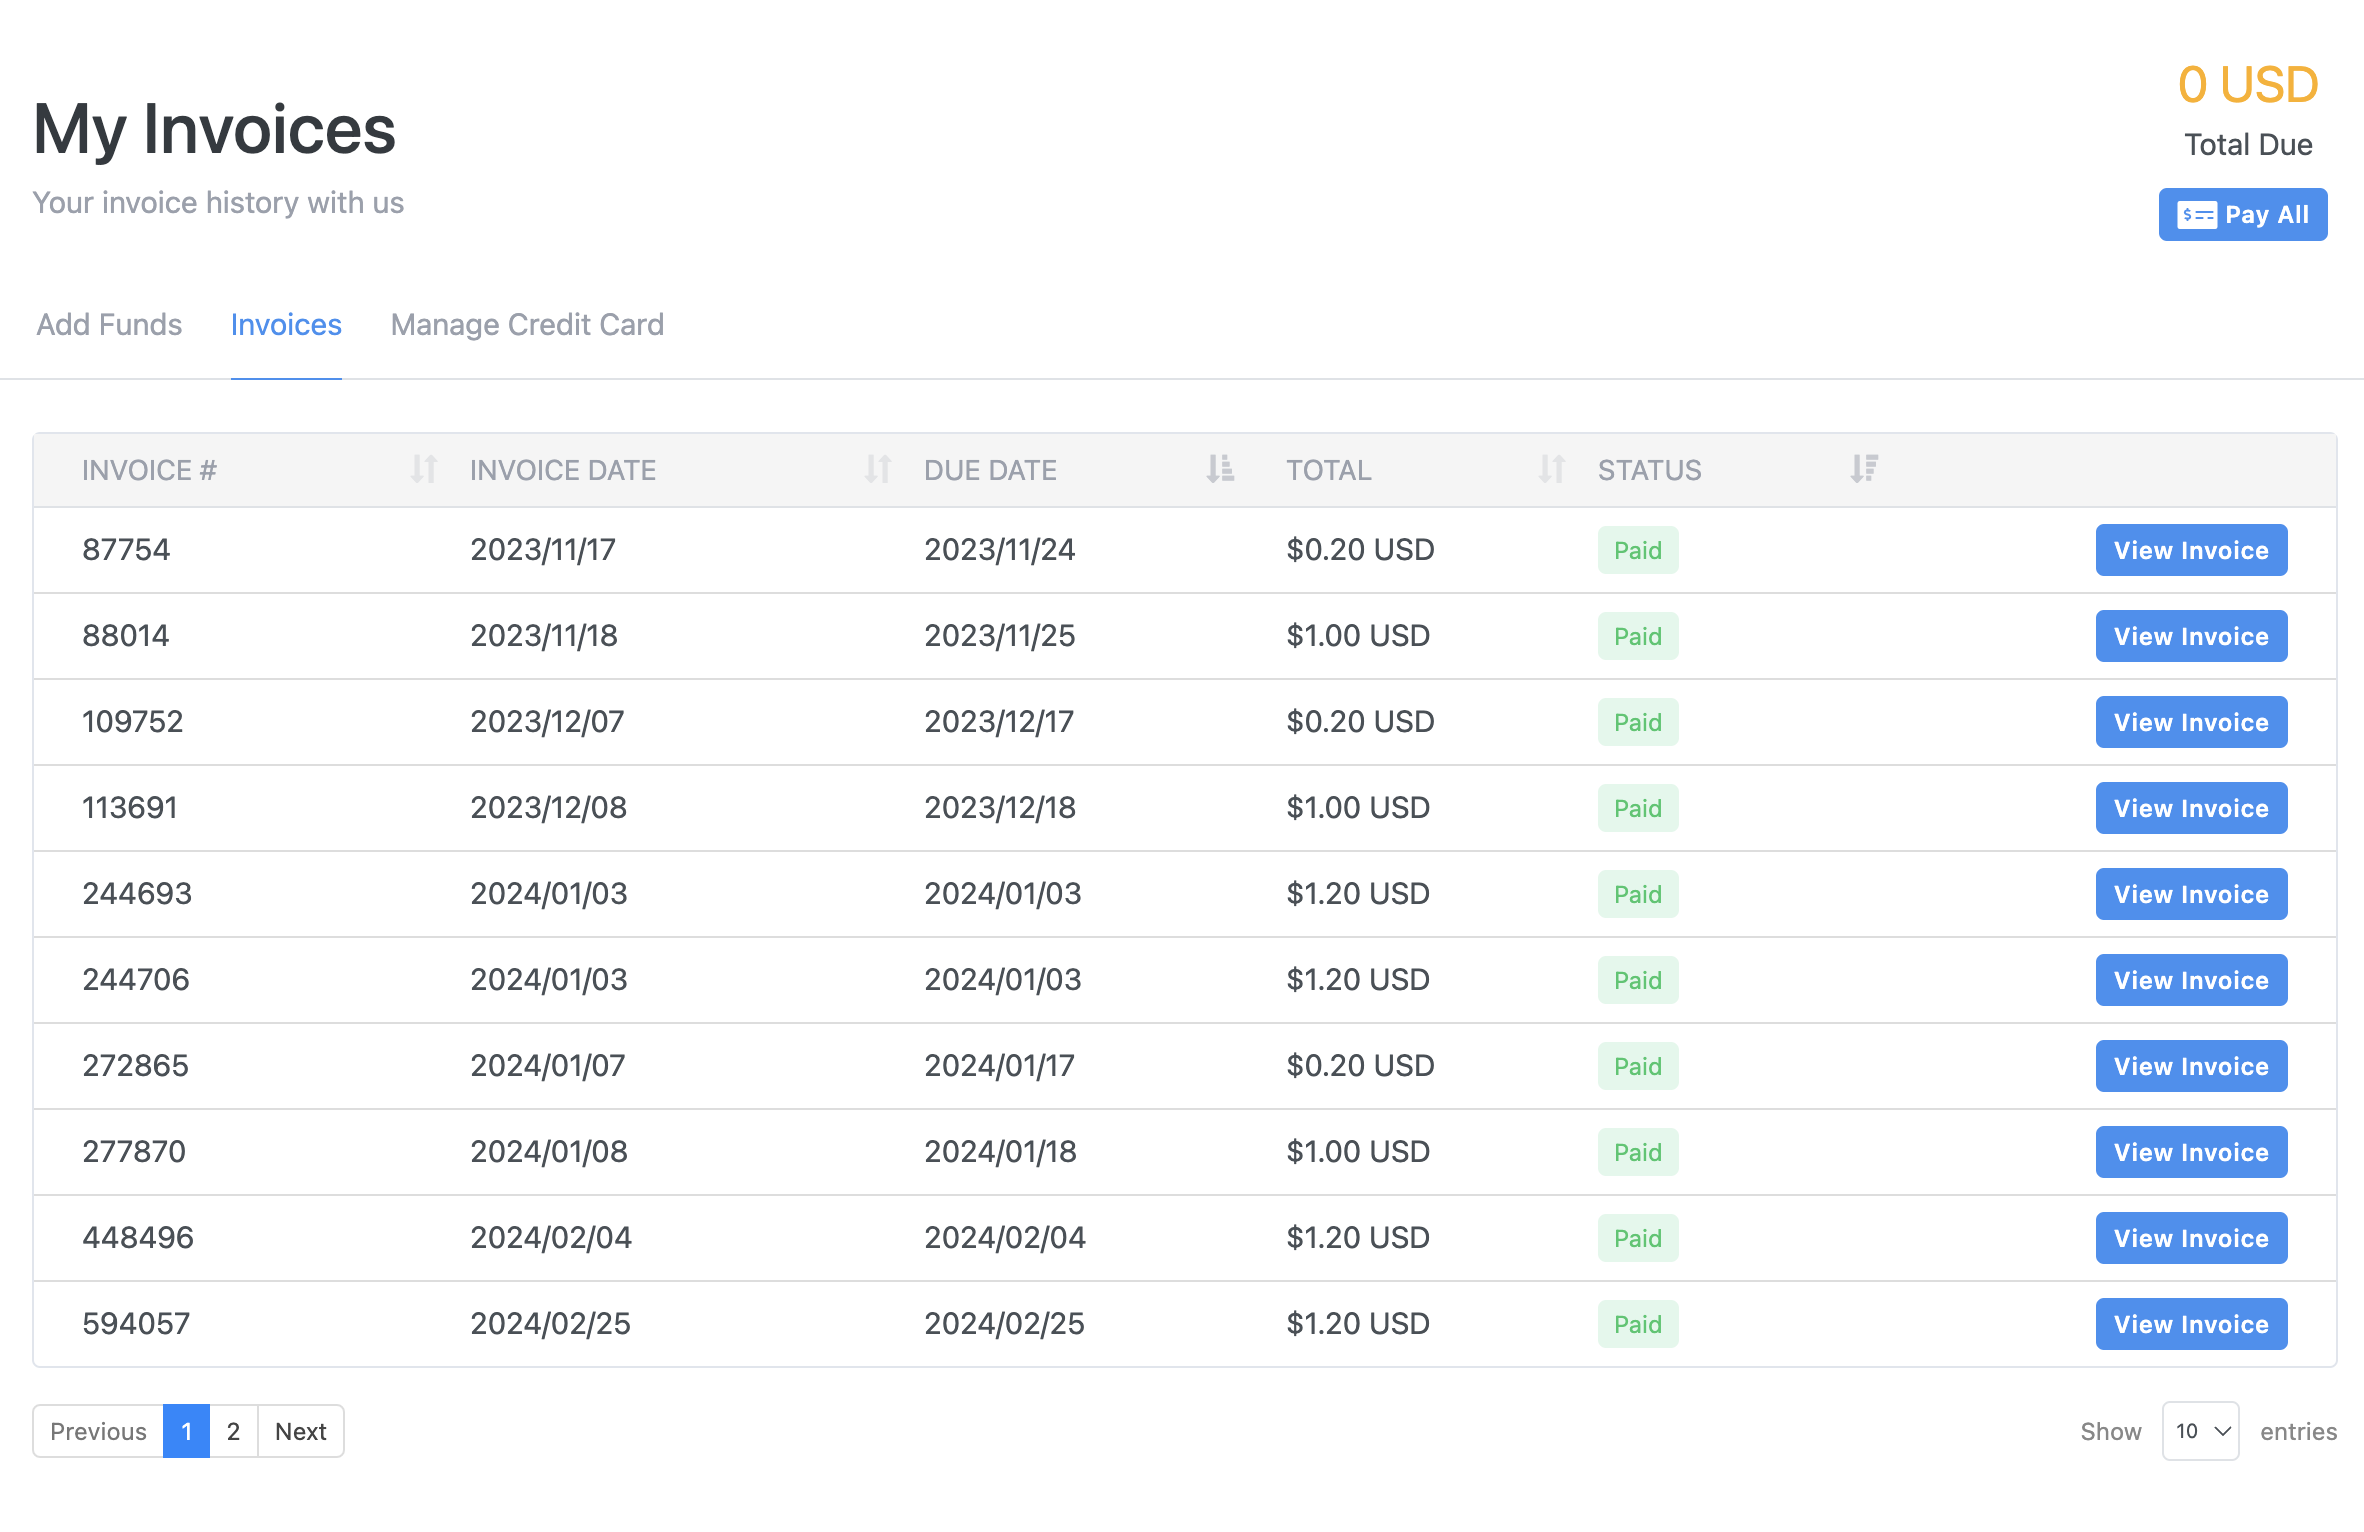
Once the invoice is generated, you’ll receive an email, and an unpaid invoice will appear in your client area. Simply pay this invoice to complete your renewal.
Renewing during promotions allows you to lock in lower prices. If you’re worried about forgetting, you can pre-load your balance, and the system will automatically deduct the renewal amount when it’s due.
If you have any further questions, feel free to submit a support ticket, and we’ll be happy to assist you.
- 747 Users Found This Useful